Step 1: Create Z-API connection
On the left side menu, click on the options.
You’ll be taken to the listing screen of the settings.
Click on the "Connections" option.
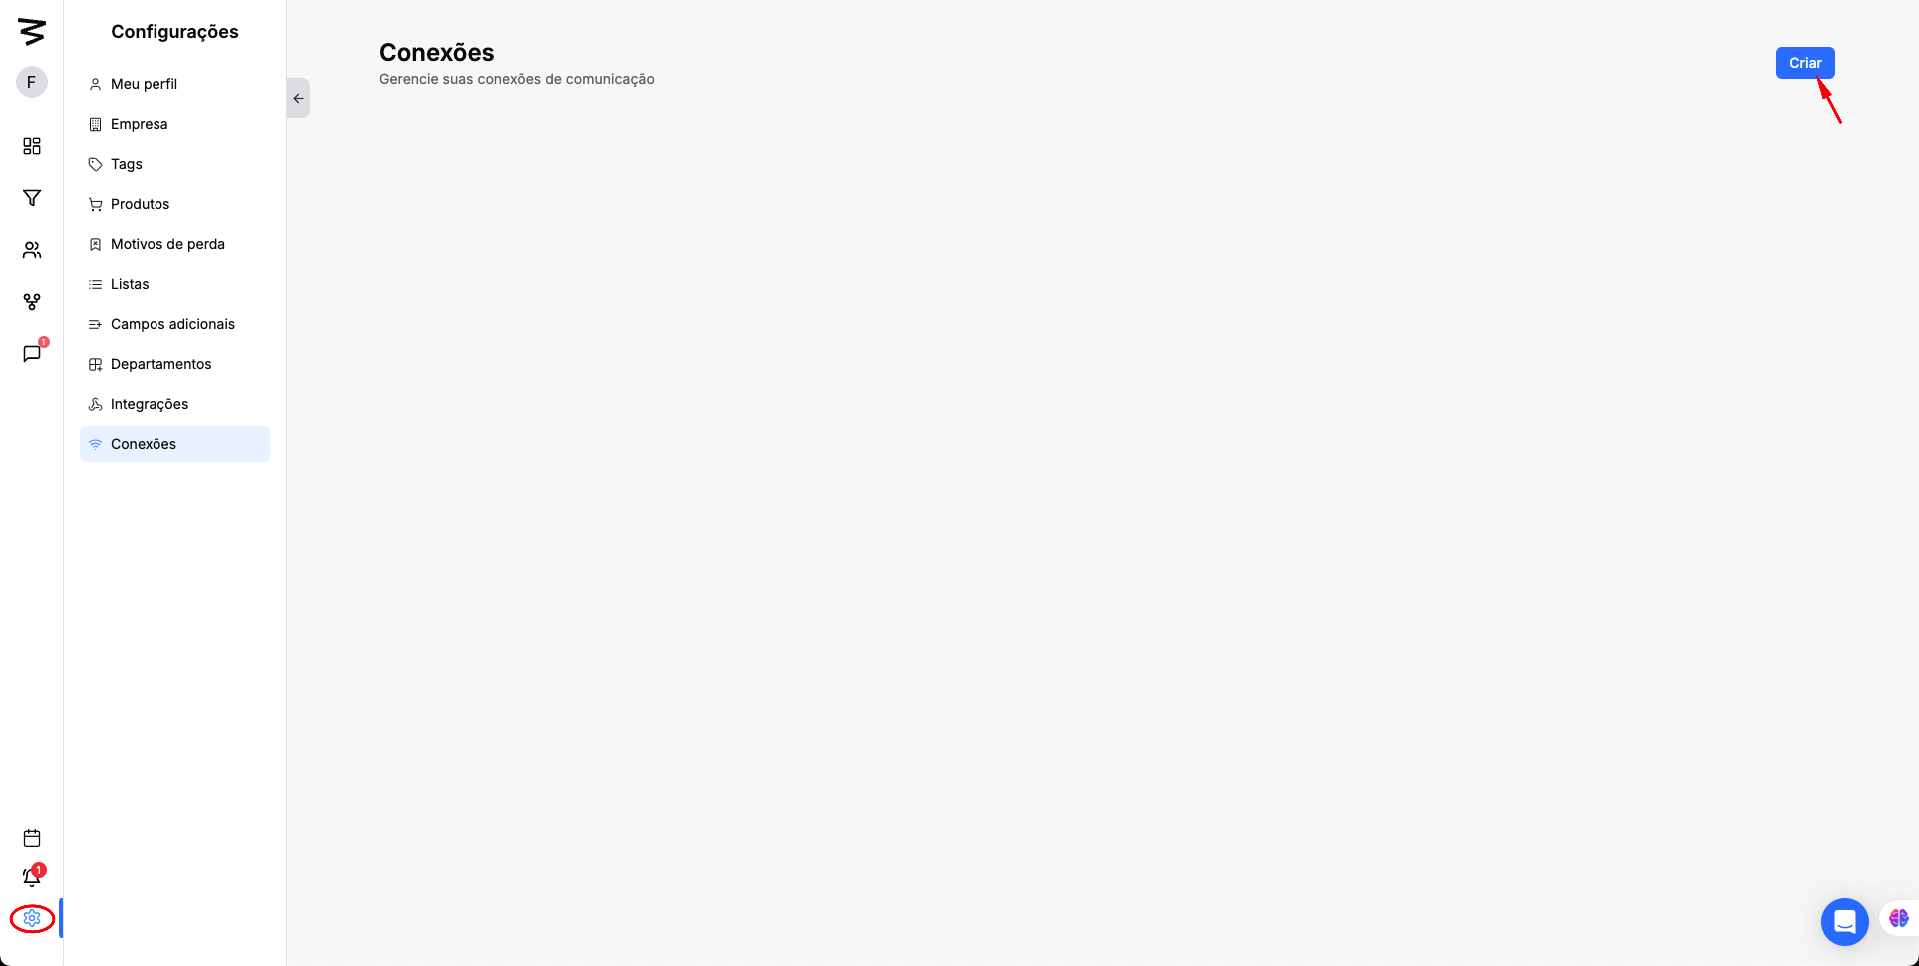
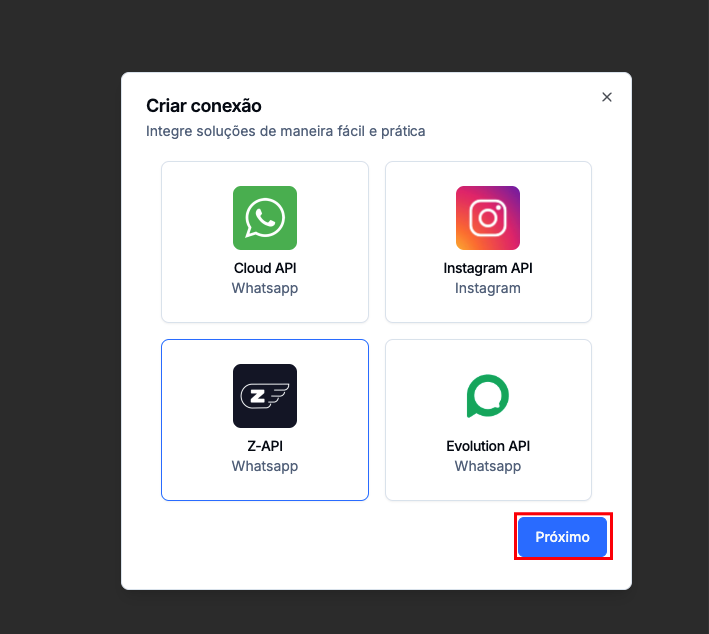
Click on "Create" and select the Z-API option.
Step 2: Z-API app panel
Go to this LINK to access your Z-API account
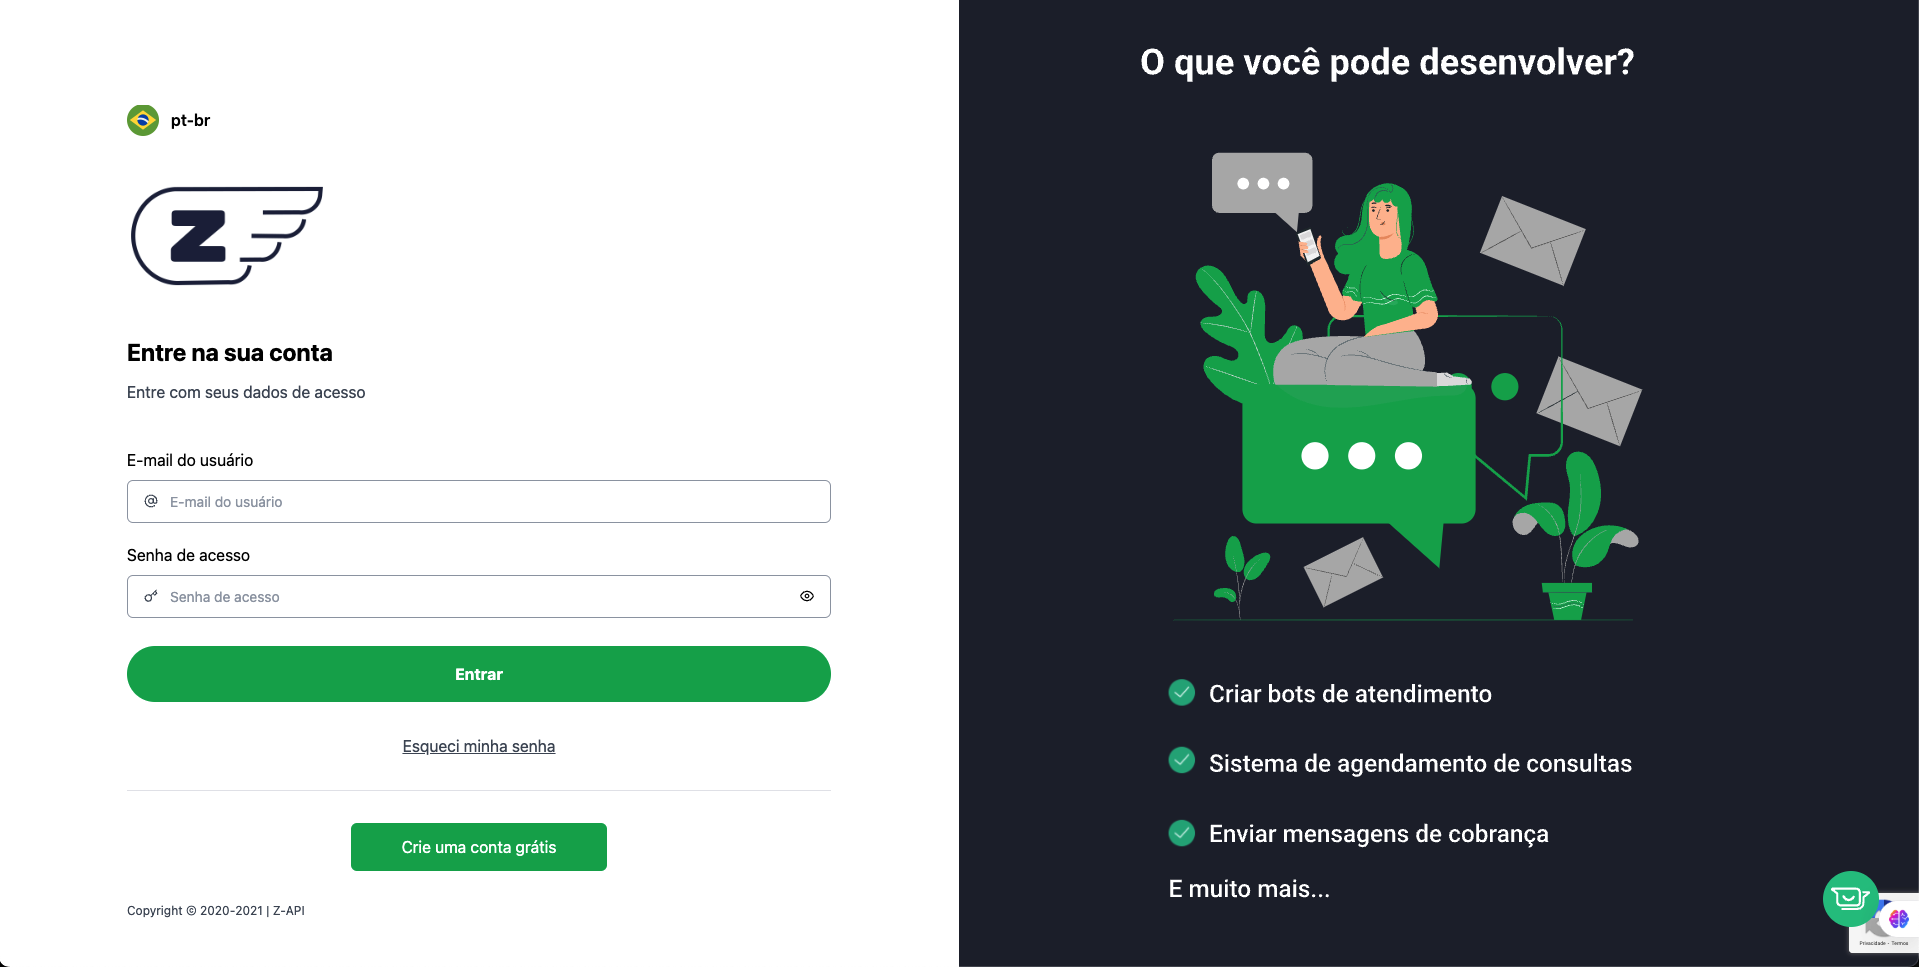
If you don’t have an account click the "Create a free account" button
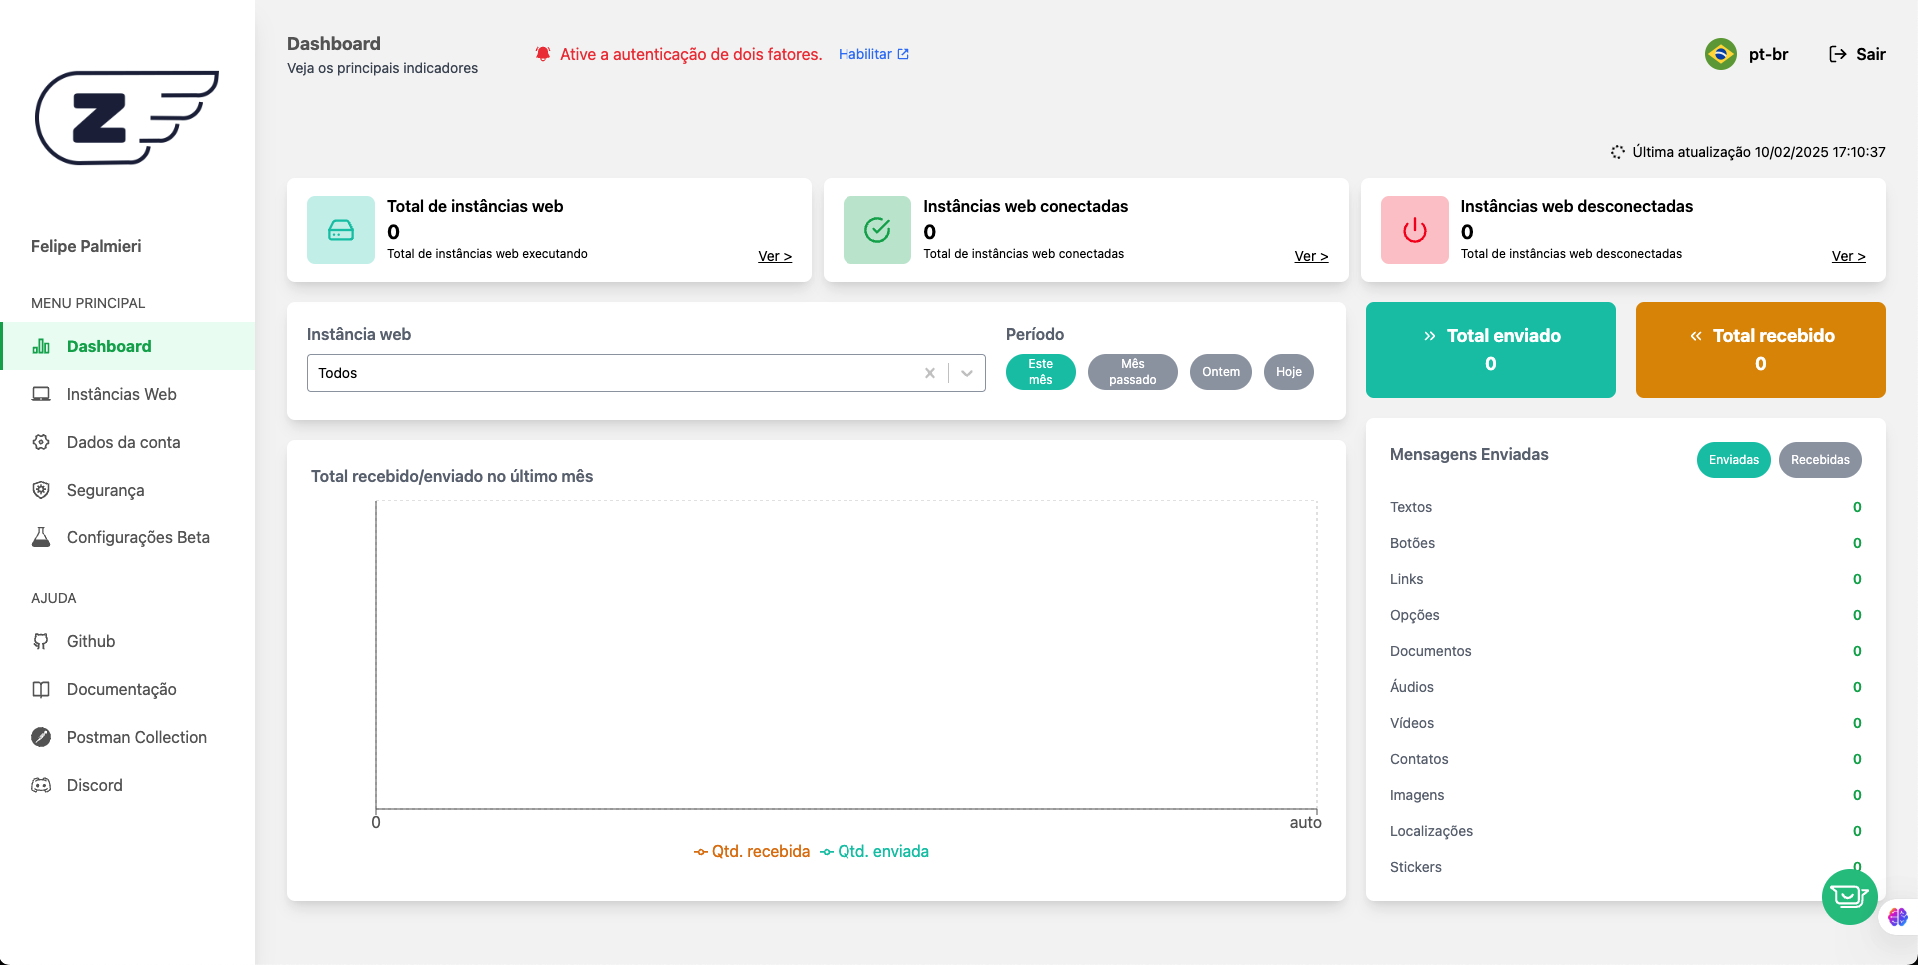
In the navigation bar go to "Web Instances" to get your Tokens
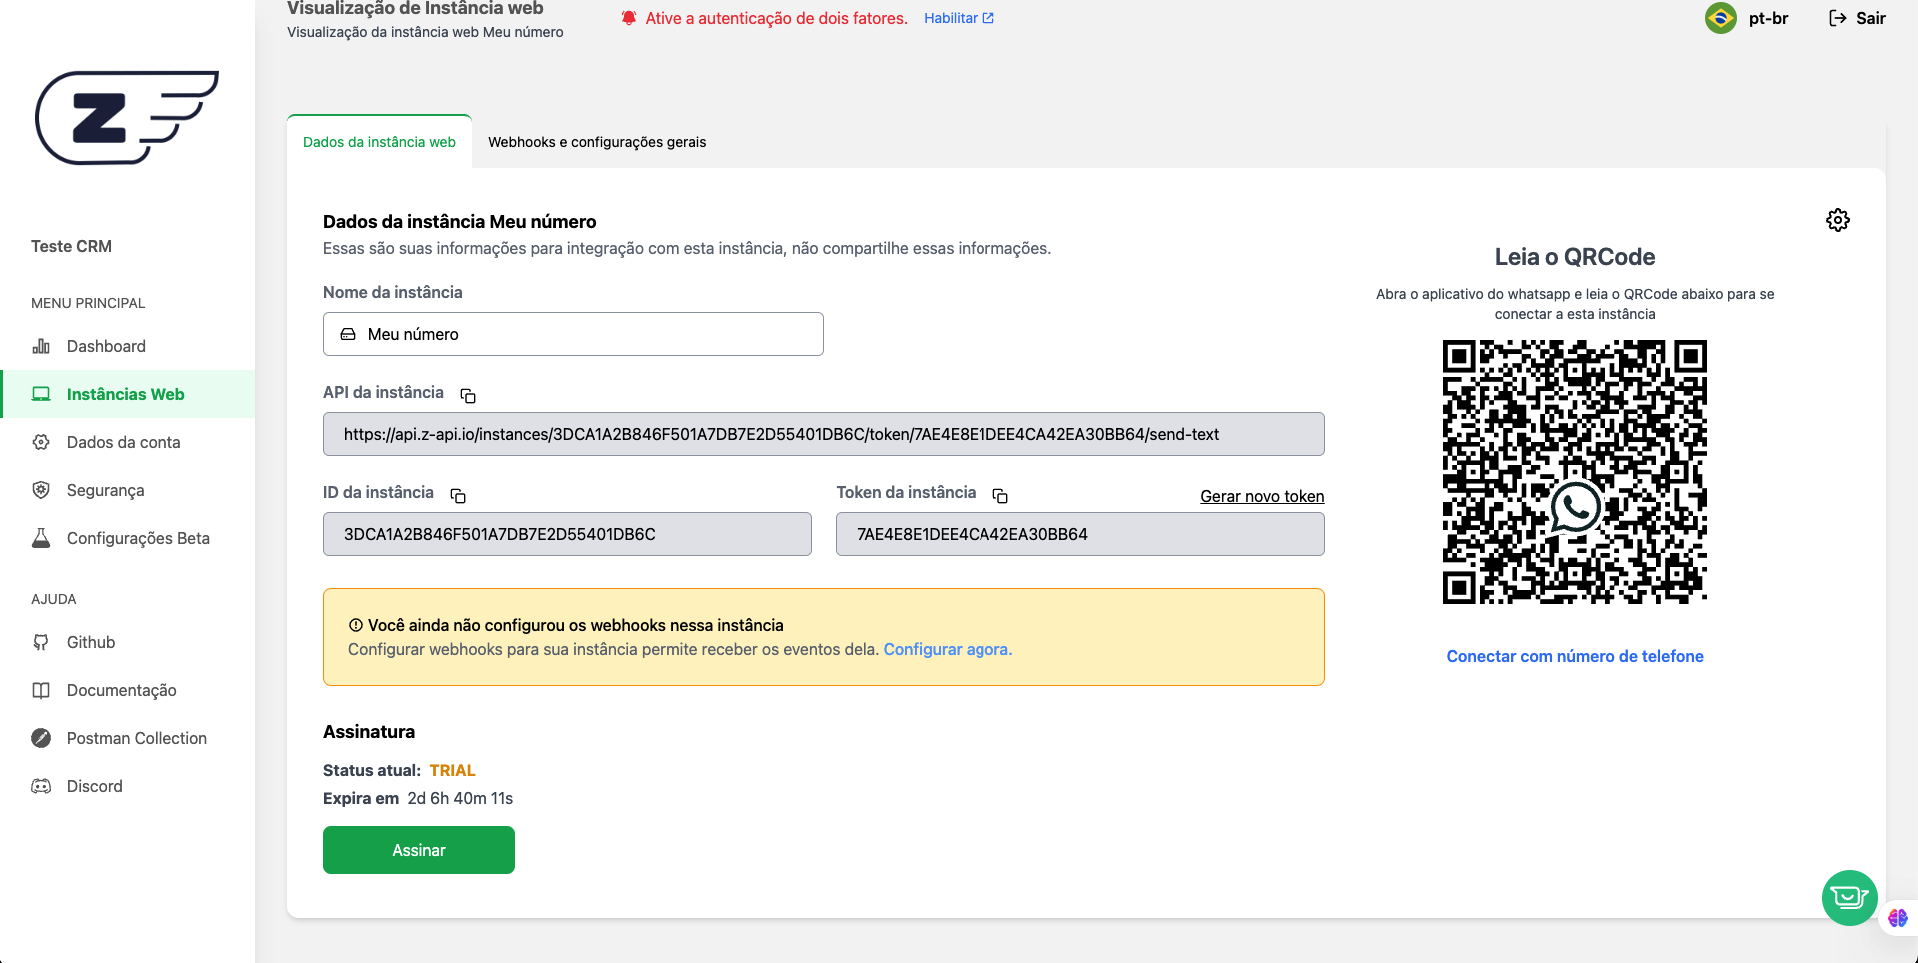
Next step is to grab those 3 keys and set them up inside the CRM
Step 3: Z-API Setup
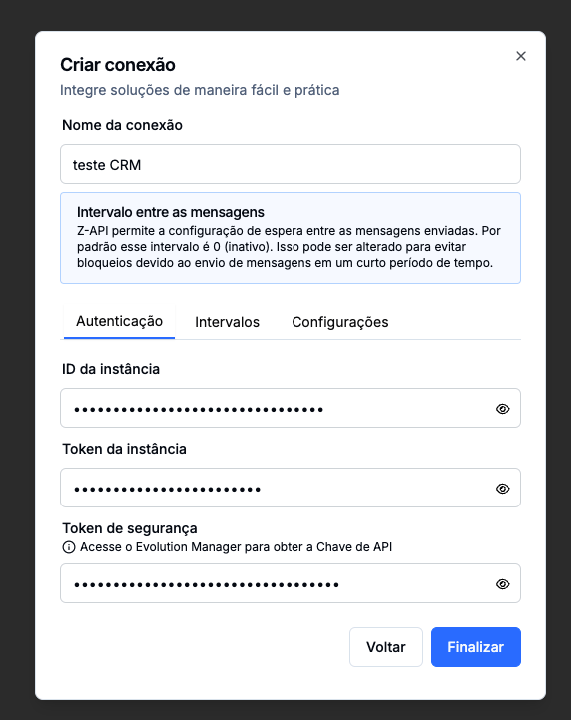
Put your reference name for the Z-API connection
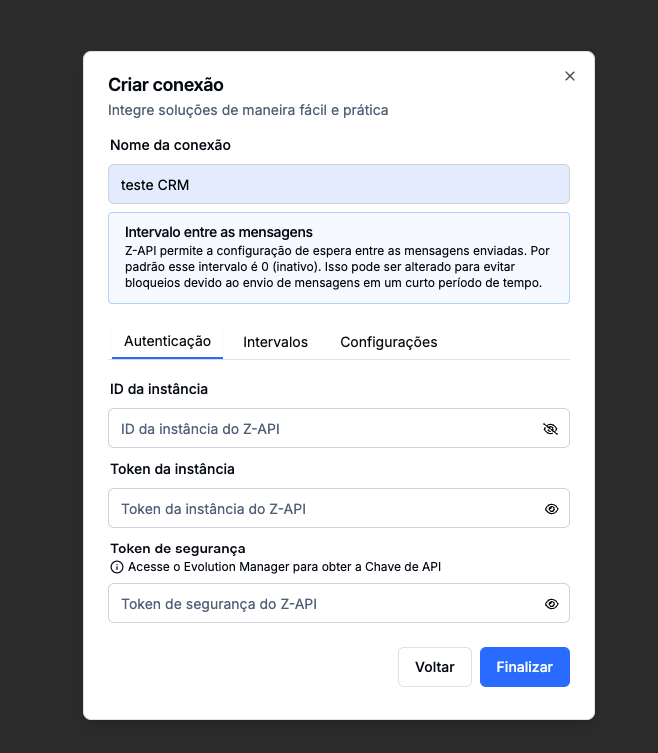
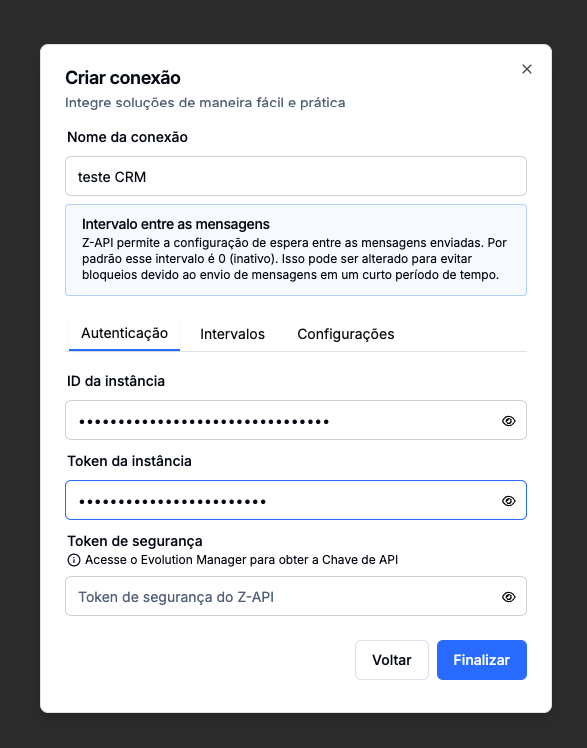
In the Z-API dashboard, copy your "Instance ID" and paste it inside the CRM in the "Instance ID"
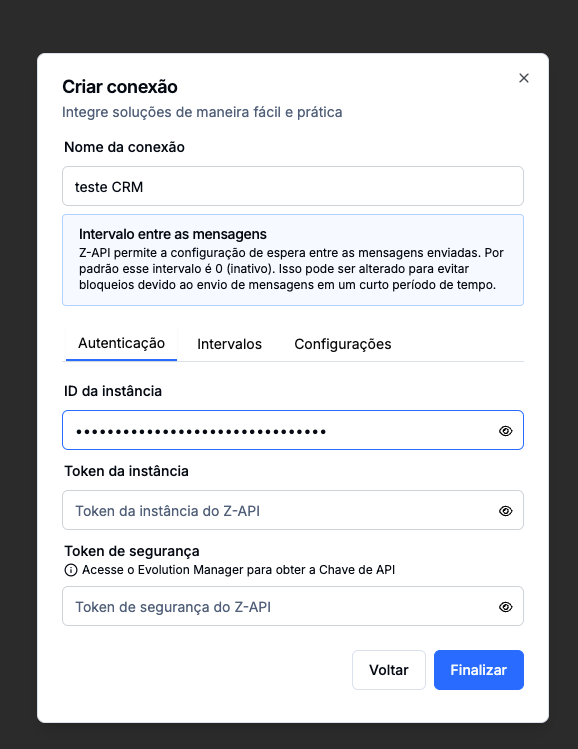
In the Z-API dashboard, copy your "Instance Token" and paste it inside the CRM in the "Instance Token"
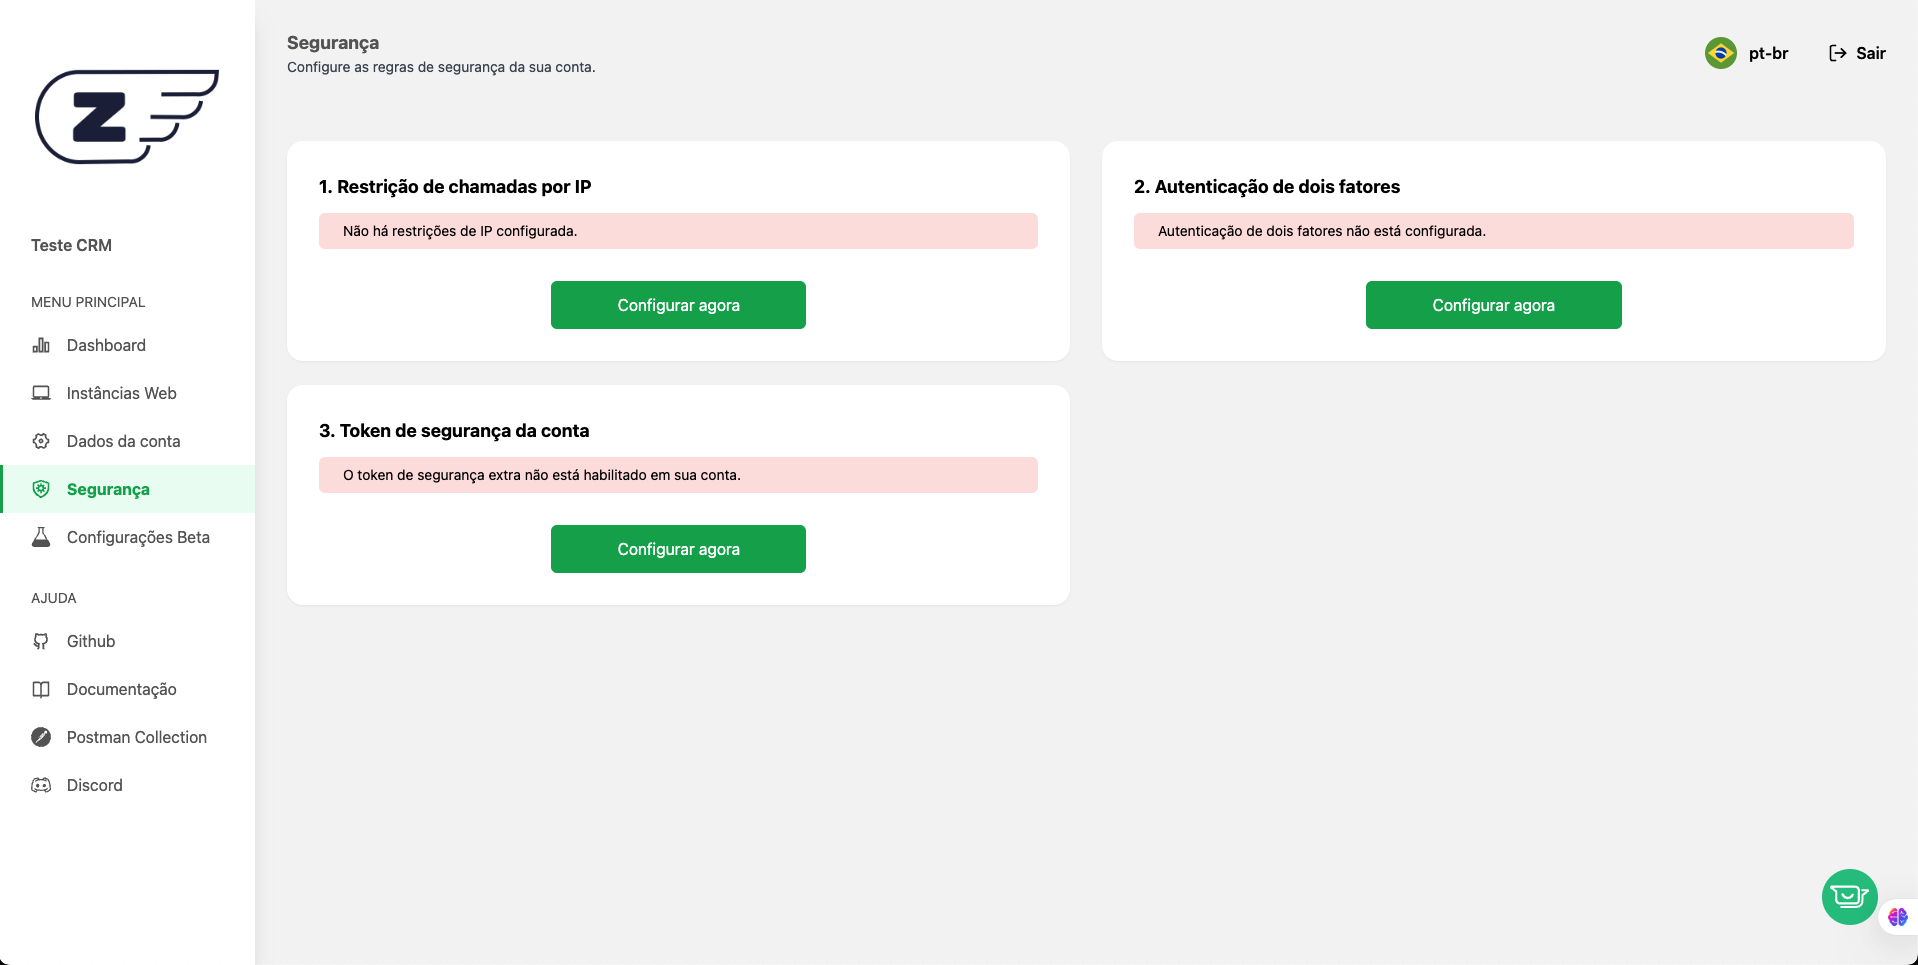
For the Security Token, go to the Z-API dashboard, in the navigation bar click on "Security"
Click the "Set up now" button
Click the button on the right of the security code
Check the box for the field "I have already copied the token and reviewed the text above" and click Finish.
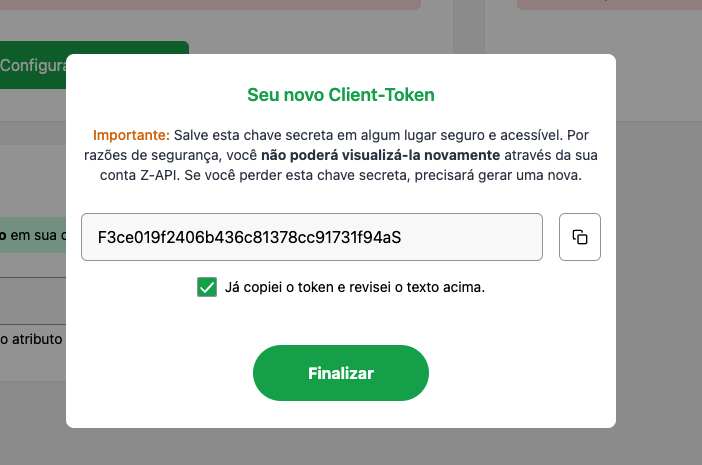
Now paste that security code into the CRM in "Security token"
Step 4: Scan QRCode
Finally, open the WhatsApp app and use the QRCode below to connect this instance.
This way you'll finish connecting Z-API to the CRM
