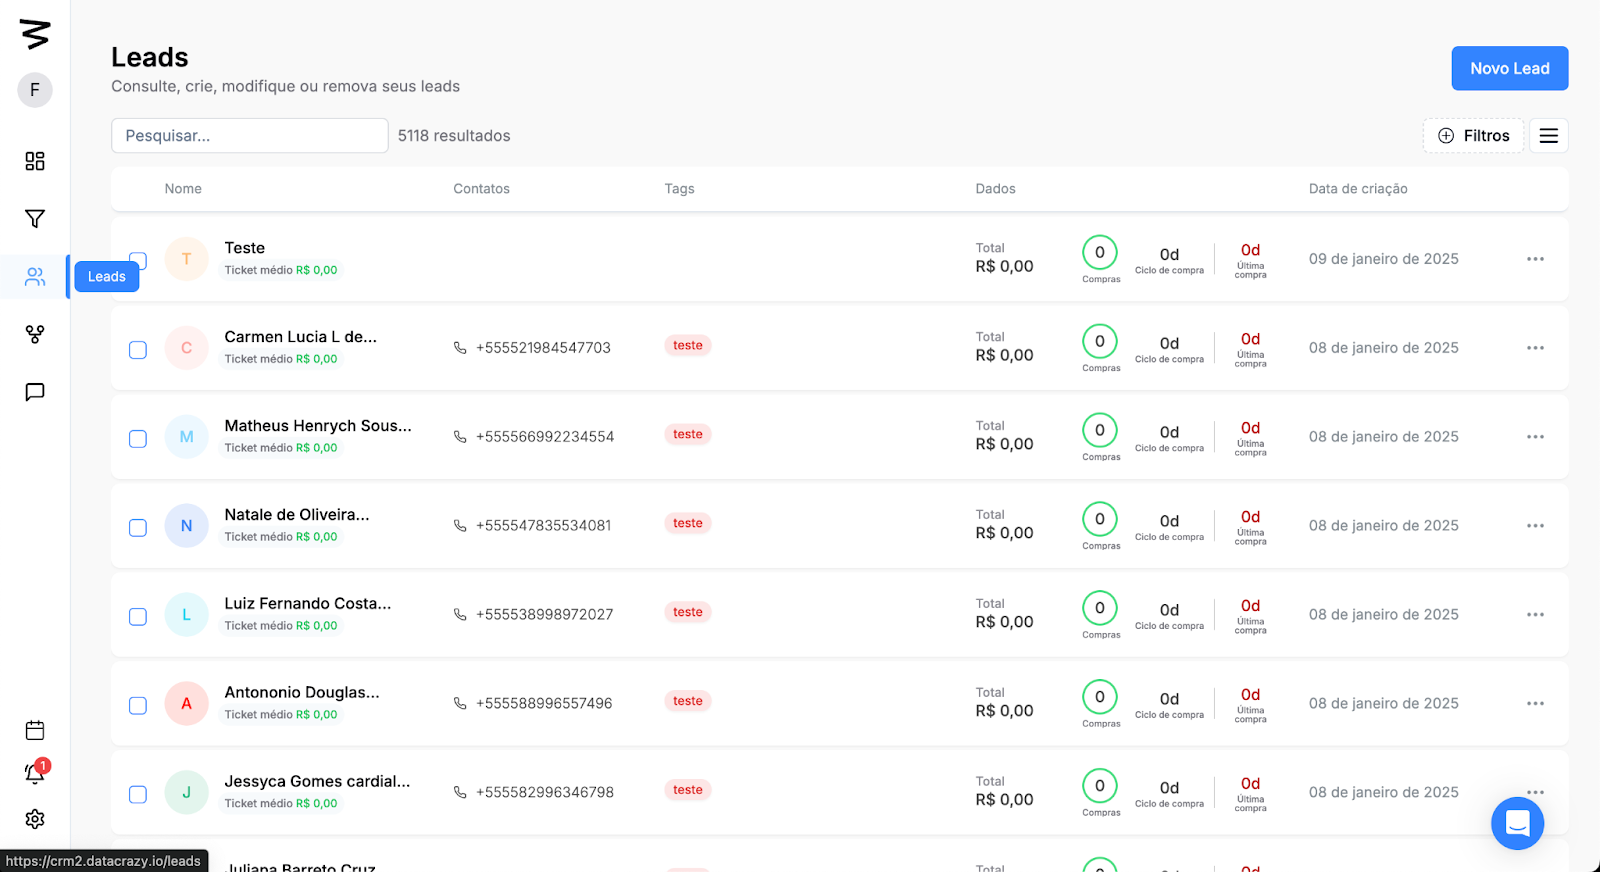
On the left side menu, click on the Leads option.
You’ll be taken to the screen that lists all existing Leads.
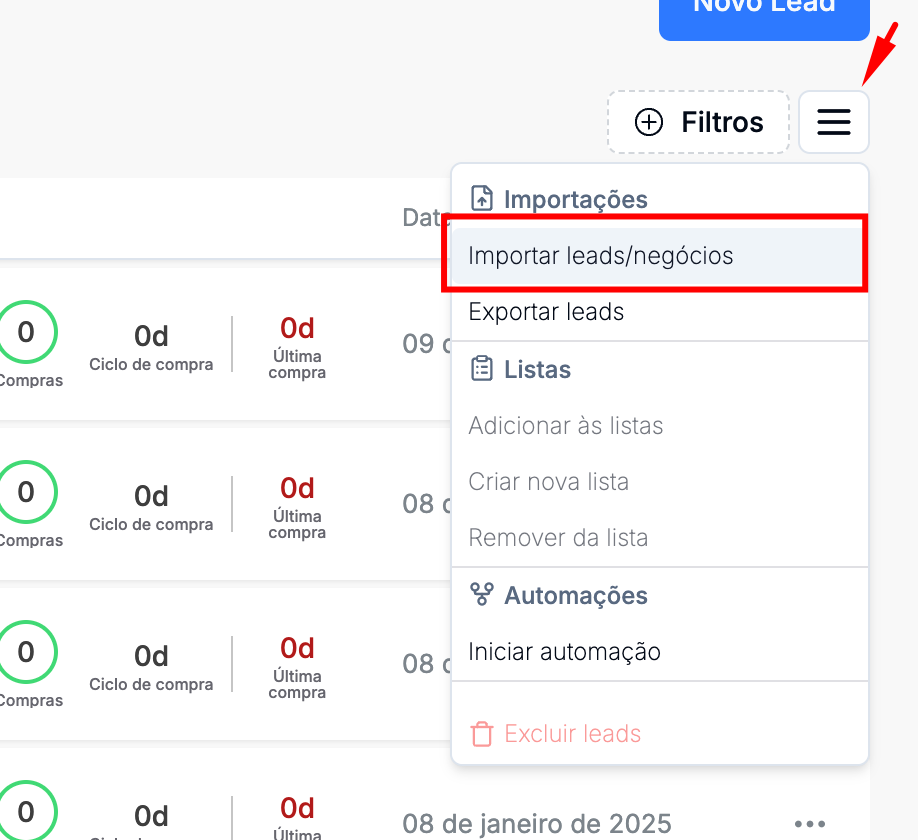
Click on “Options”.
Next, click on “Import leads/deals”.
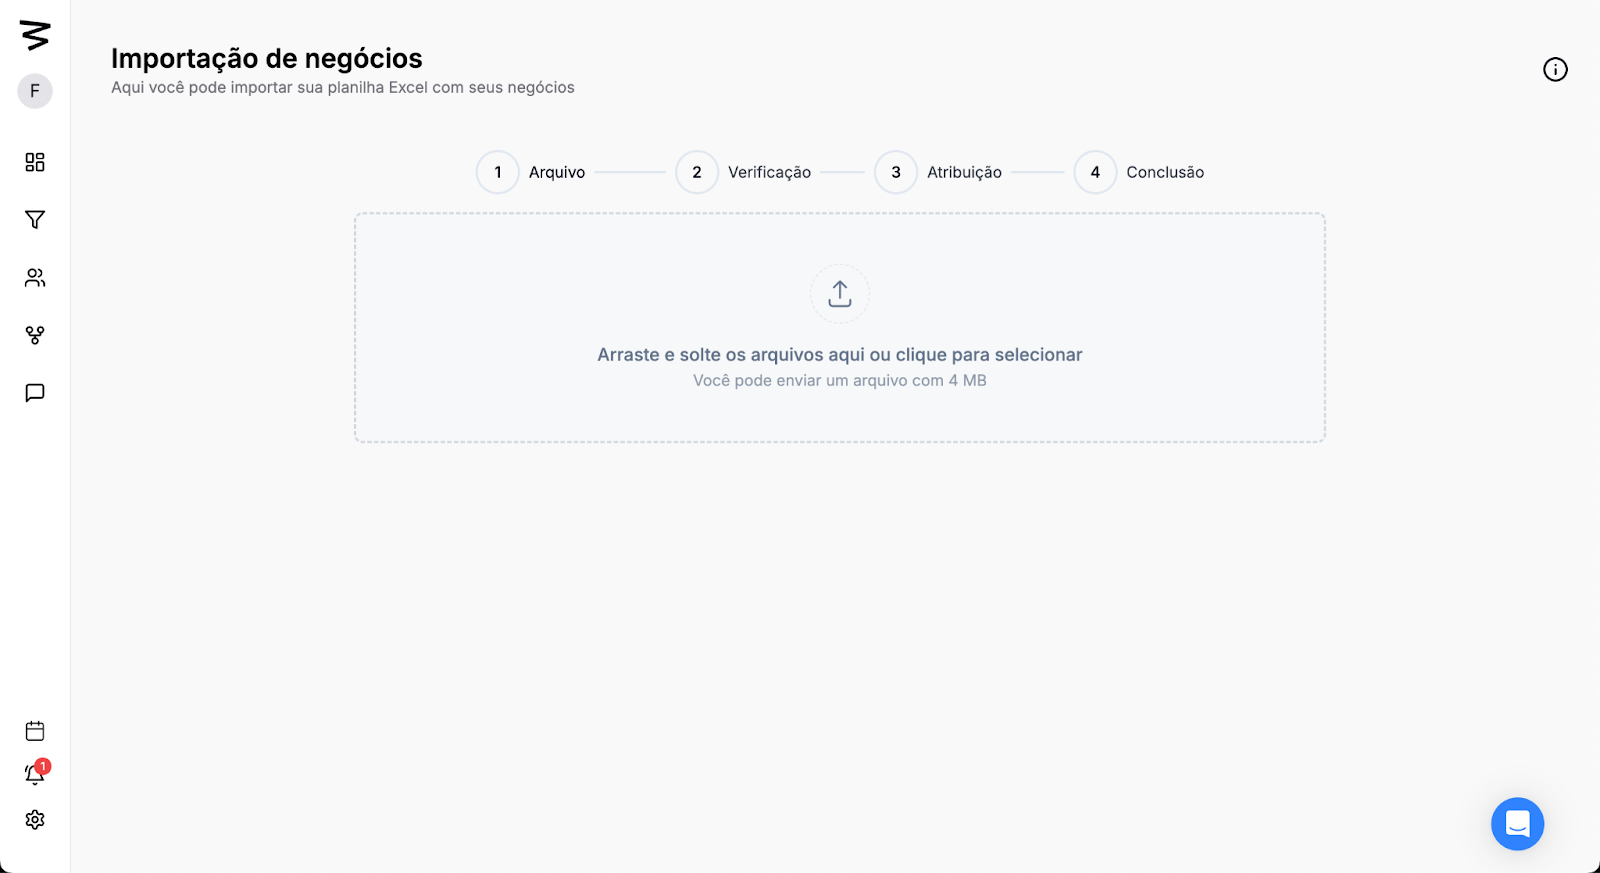
Drag or click the Upload card to select the file you want to import.
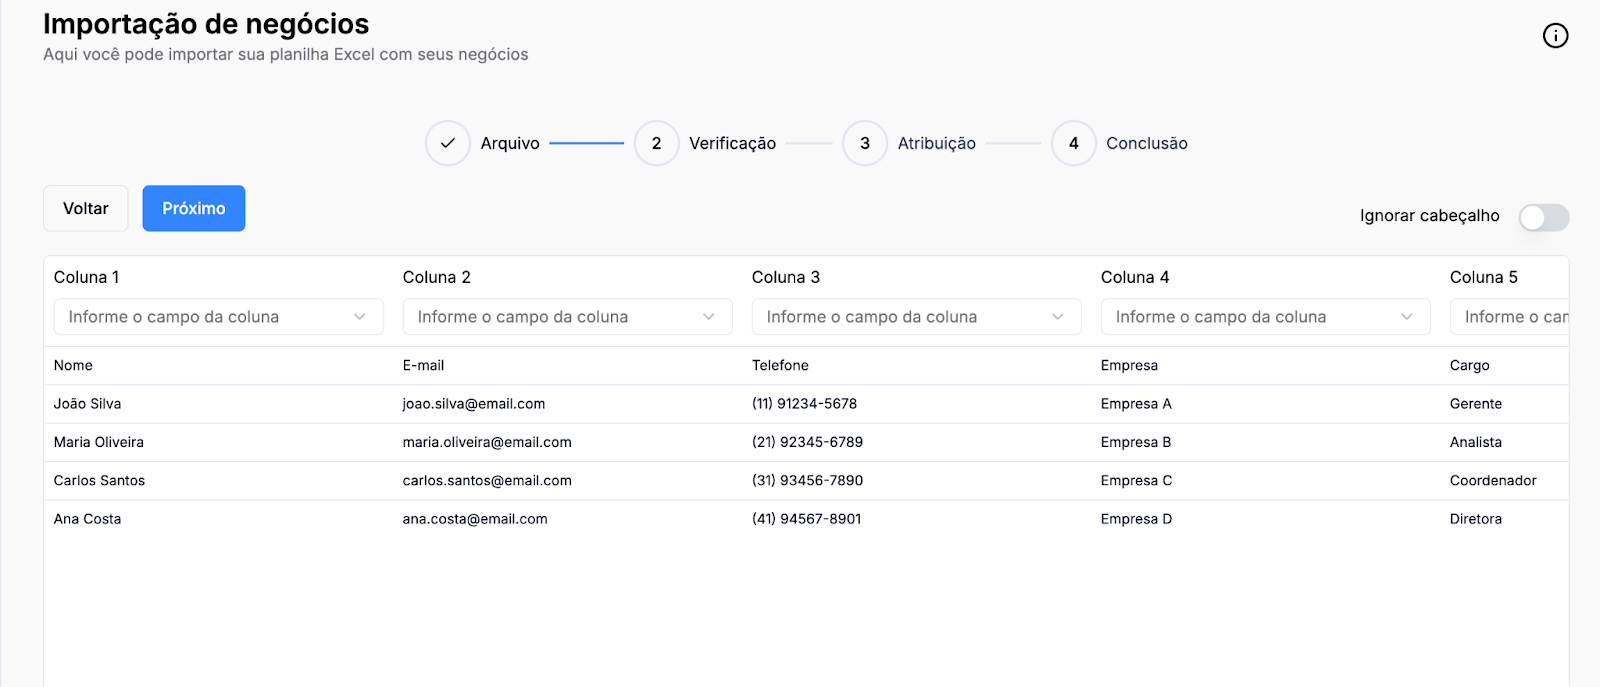
After uploading the file, you’ll see the Column Mapping screen. This step is crucial to make sure the info from your file is correctly identified by the CRM.
Column Name: Check the columns listed on the screen.
Select the Corresponding Field: In each column, click the dropdown menu "Select the column field" and choose the matching CRM field, like:
Column 1 → Name
Column 2 → Email
Column 3 → Phone
Column 4 → Company
Column 5 → Position
Ignore Header: If the imported file has a header (column names), enable the "Ignore header" option.
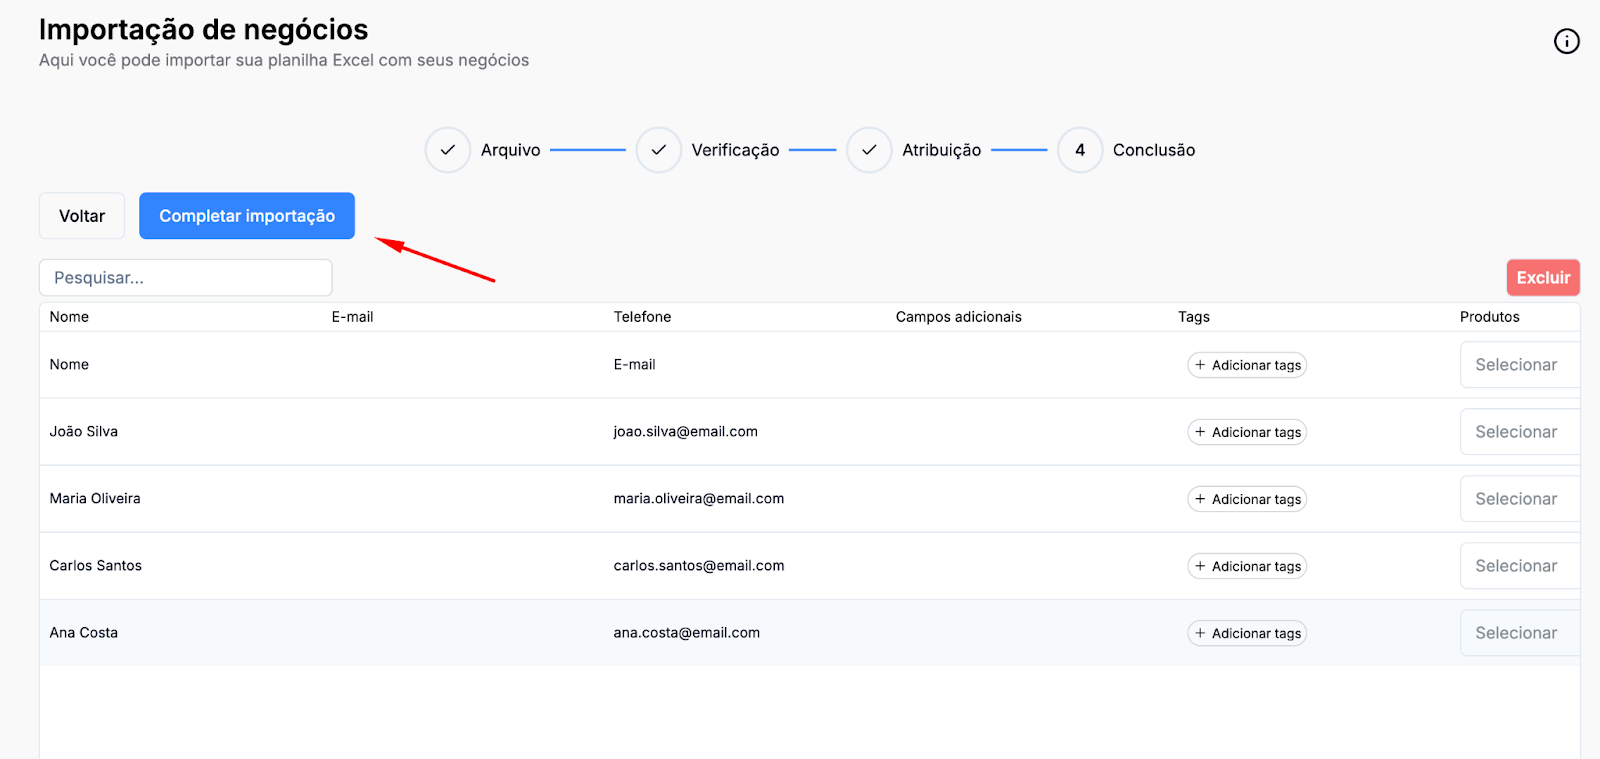
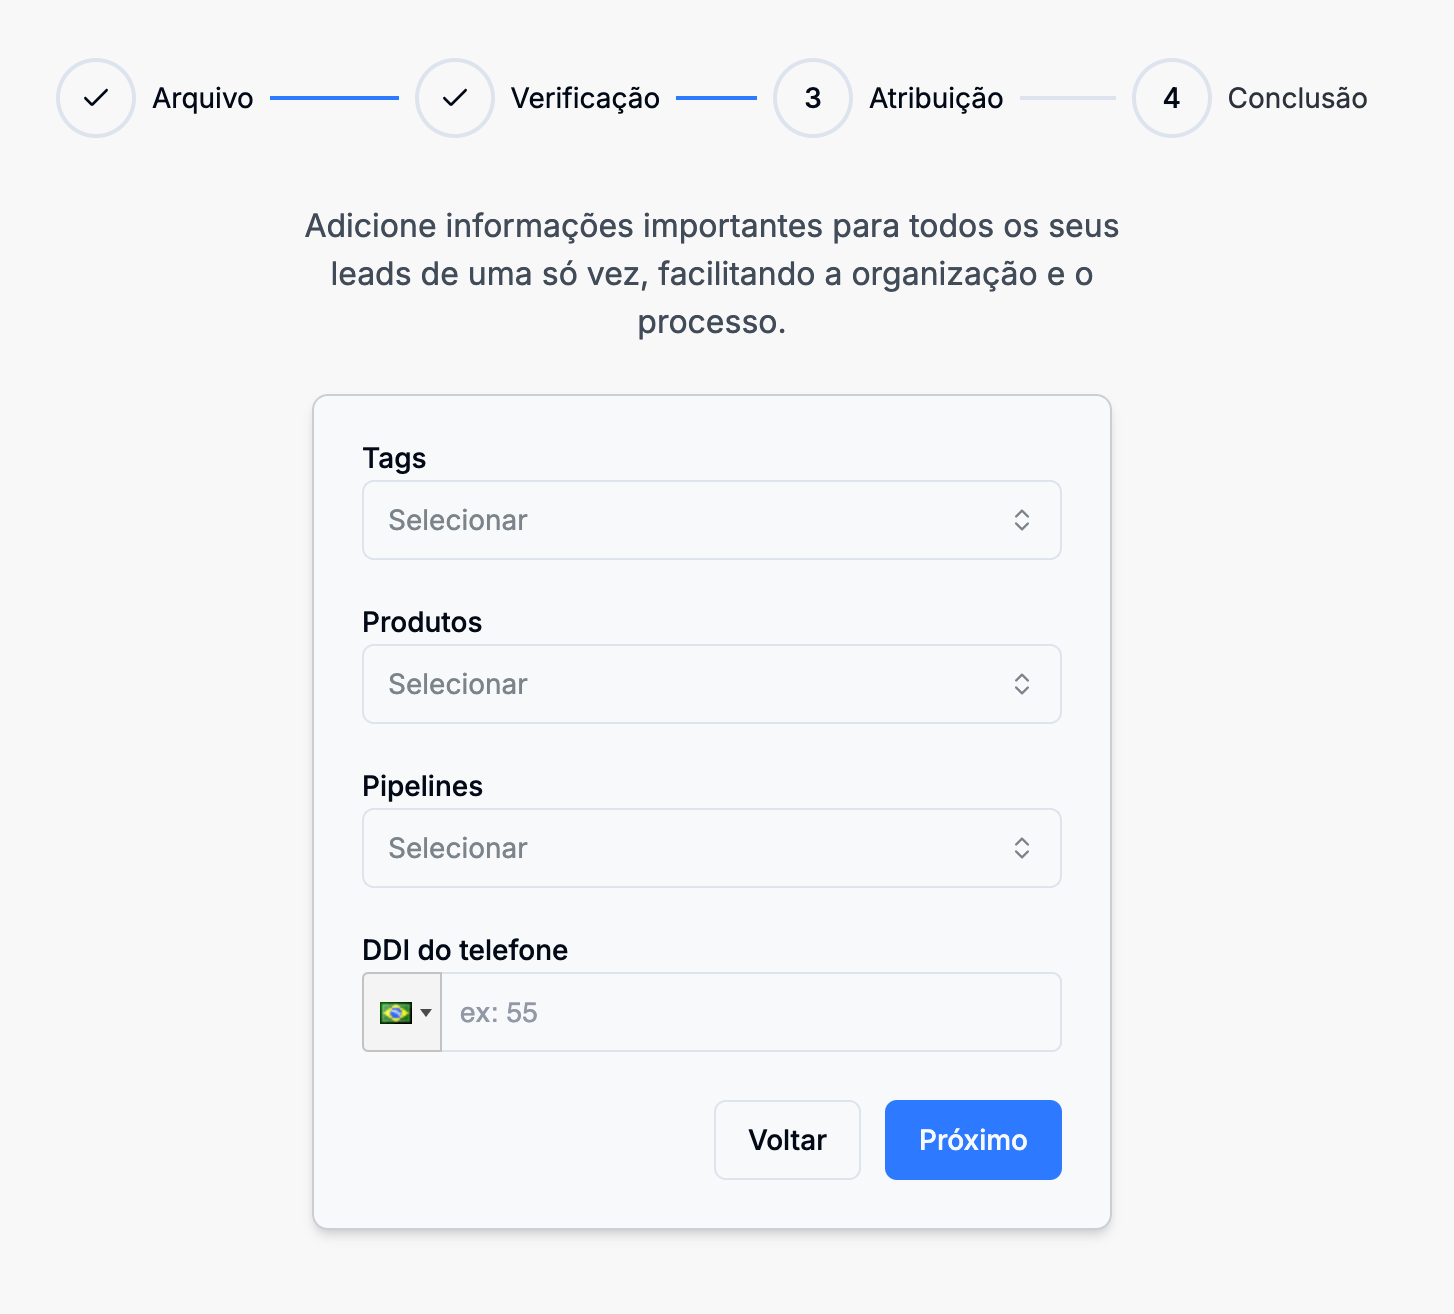
After the verification step, you'll be taken to the Assignment screen, where you can add extra info in bulk for all the Leads in the imported file.
Tags: Select one or more Tags that will be assigned to all imported Leads.
Products: If needed, select the products related to the Leads.
Pipelines: Choose the sales pipeline that will be assigned to the Leads.
Phone DDI: Enter the default DDI for the Leads' phone numbers. For example, in Brazil, the DDI is +55.
Finally, just click on “Complete import”