This documentation provides a step-by-step guide to set up a response filter in messages sent via WhatsApp, using interactive buttons. The automation lets you dynamically reply to the options chosen by the user, executing specific actions for each choice.
On the main dashboard, go to the section you want.
Template example with the four sample buttons.
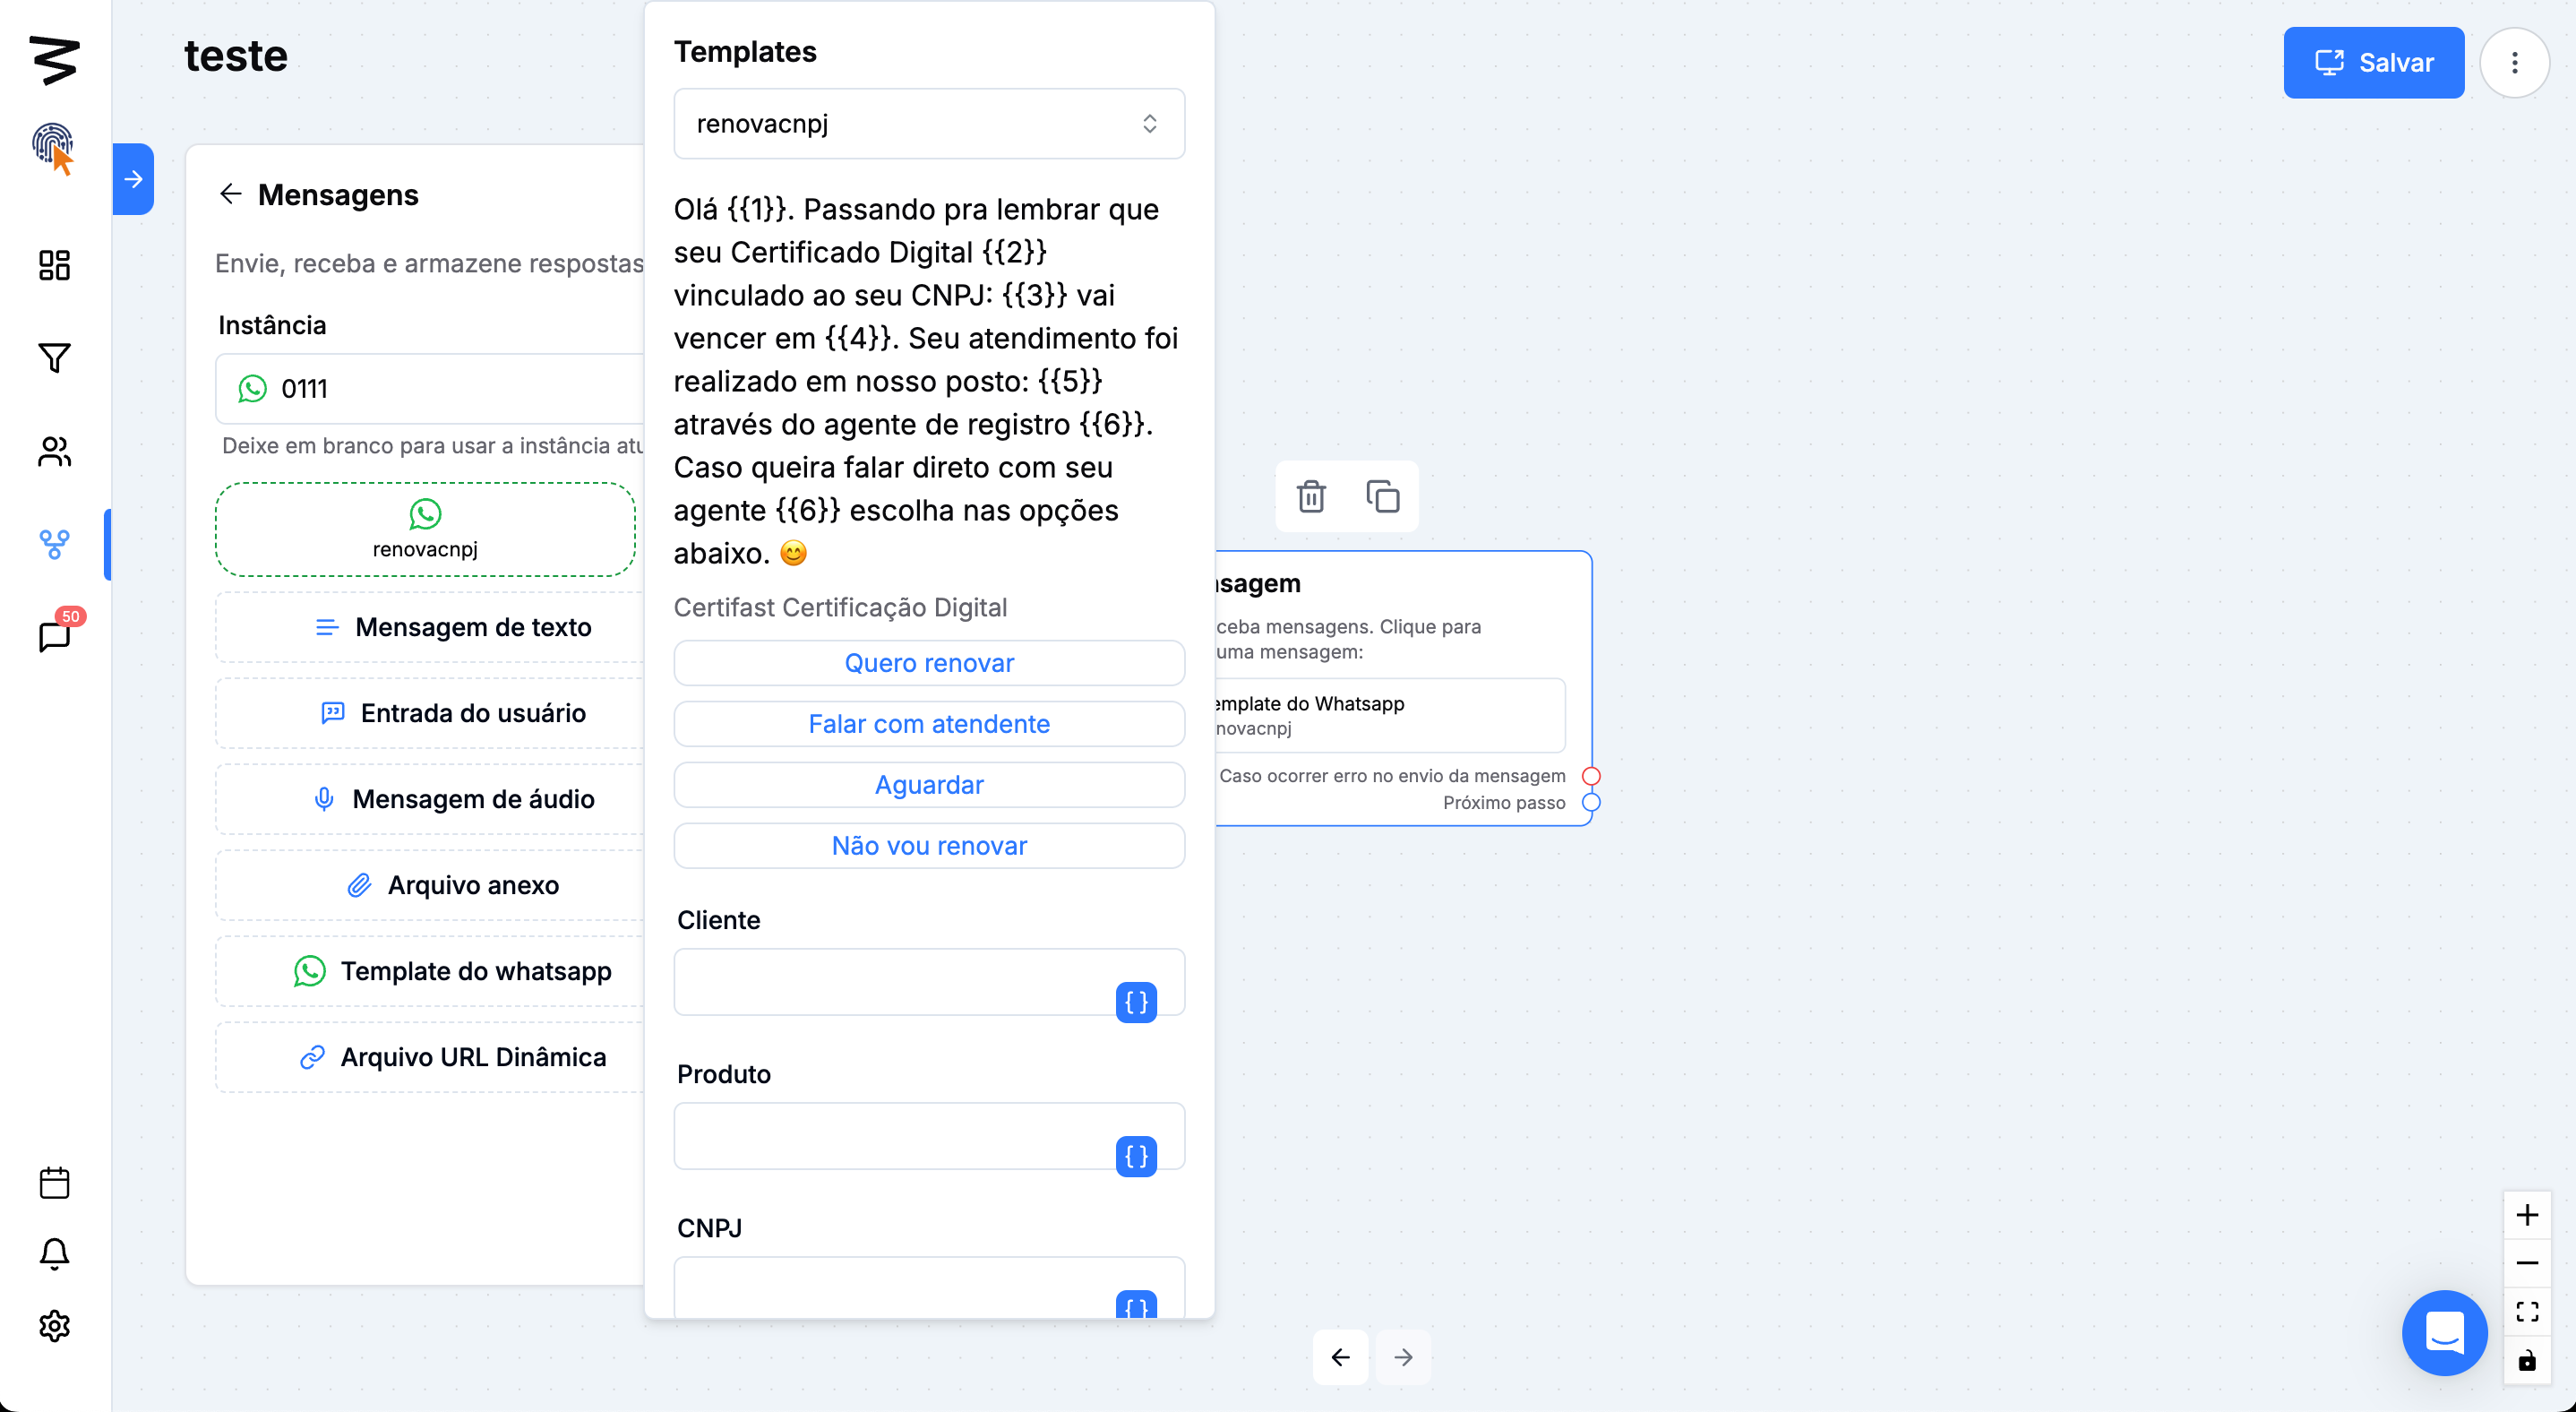
• Click on Add Functionality.
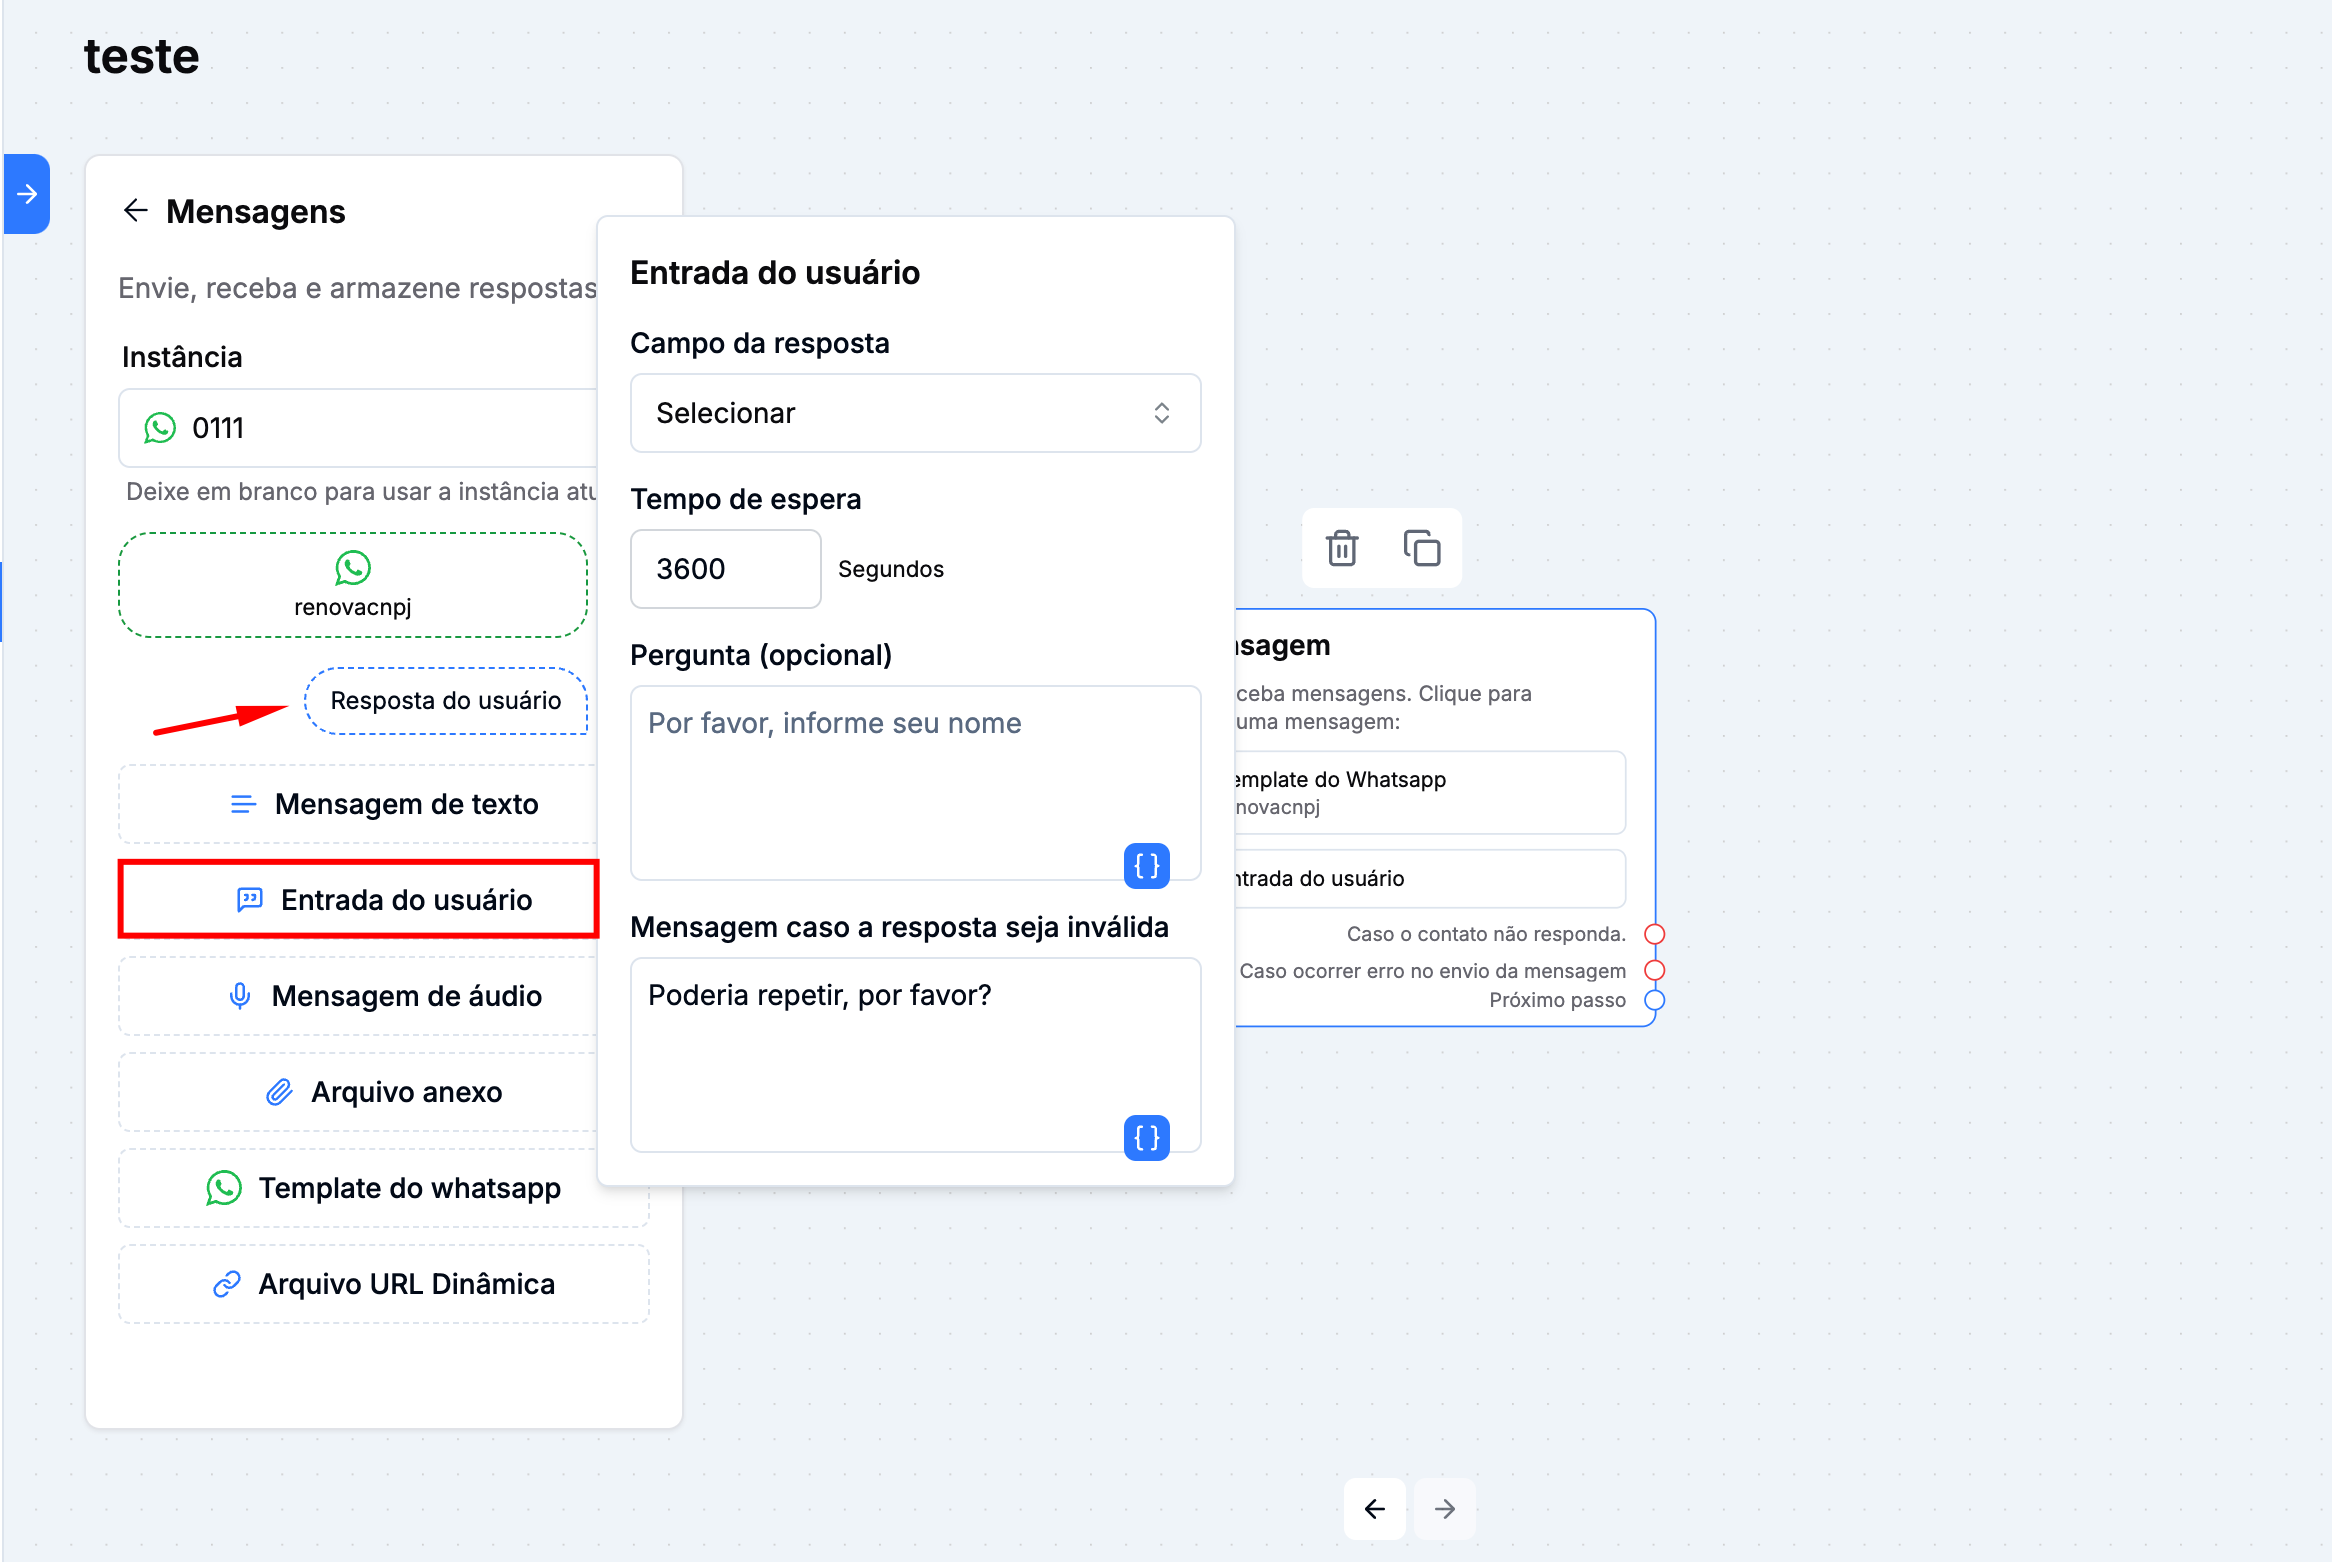
• Select the User Input option.
• Set up the functionality to check which button the customer selected.
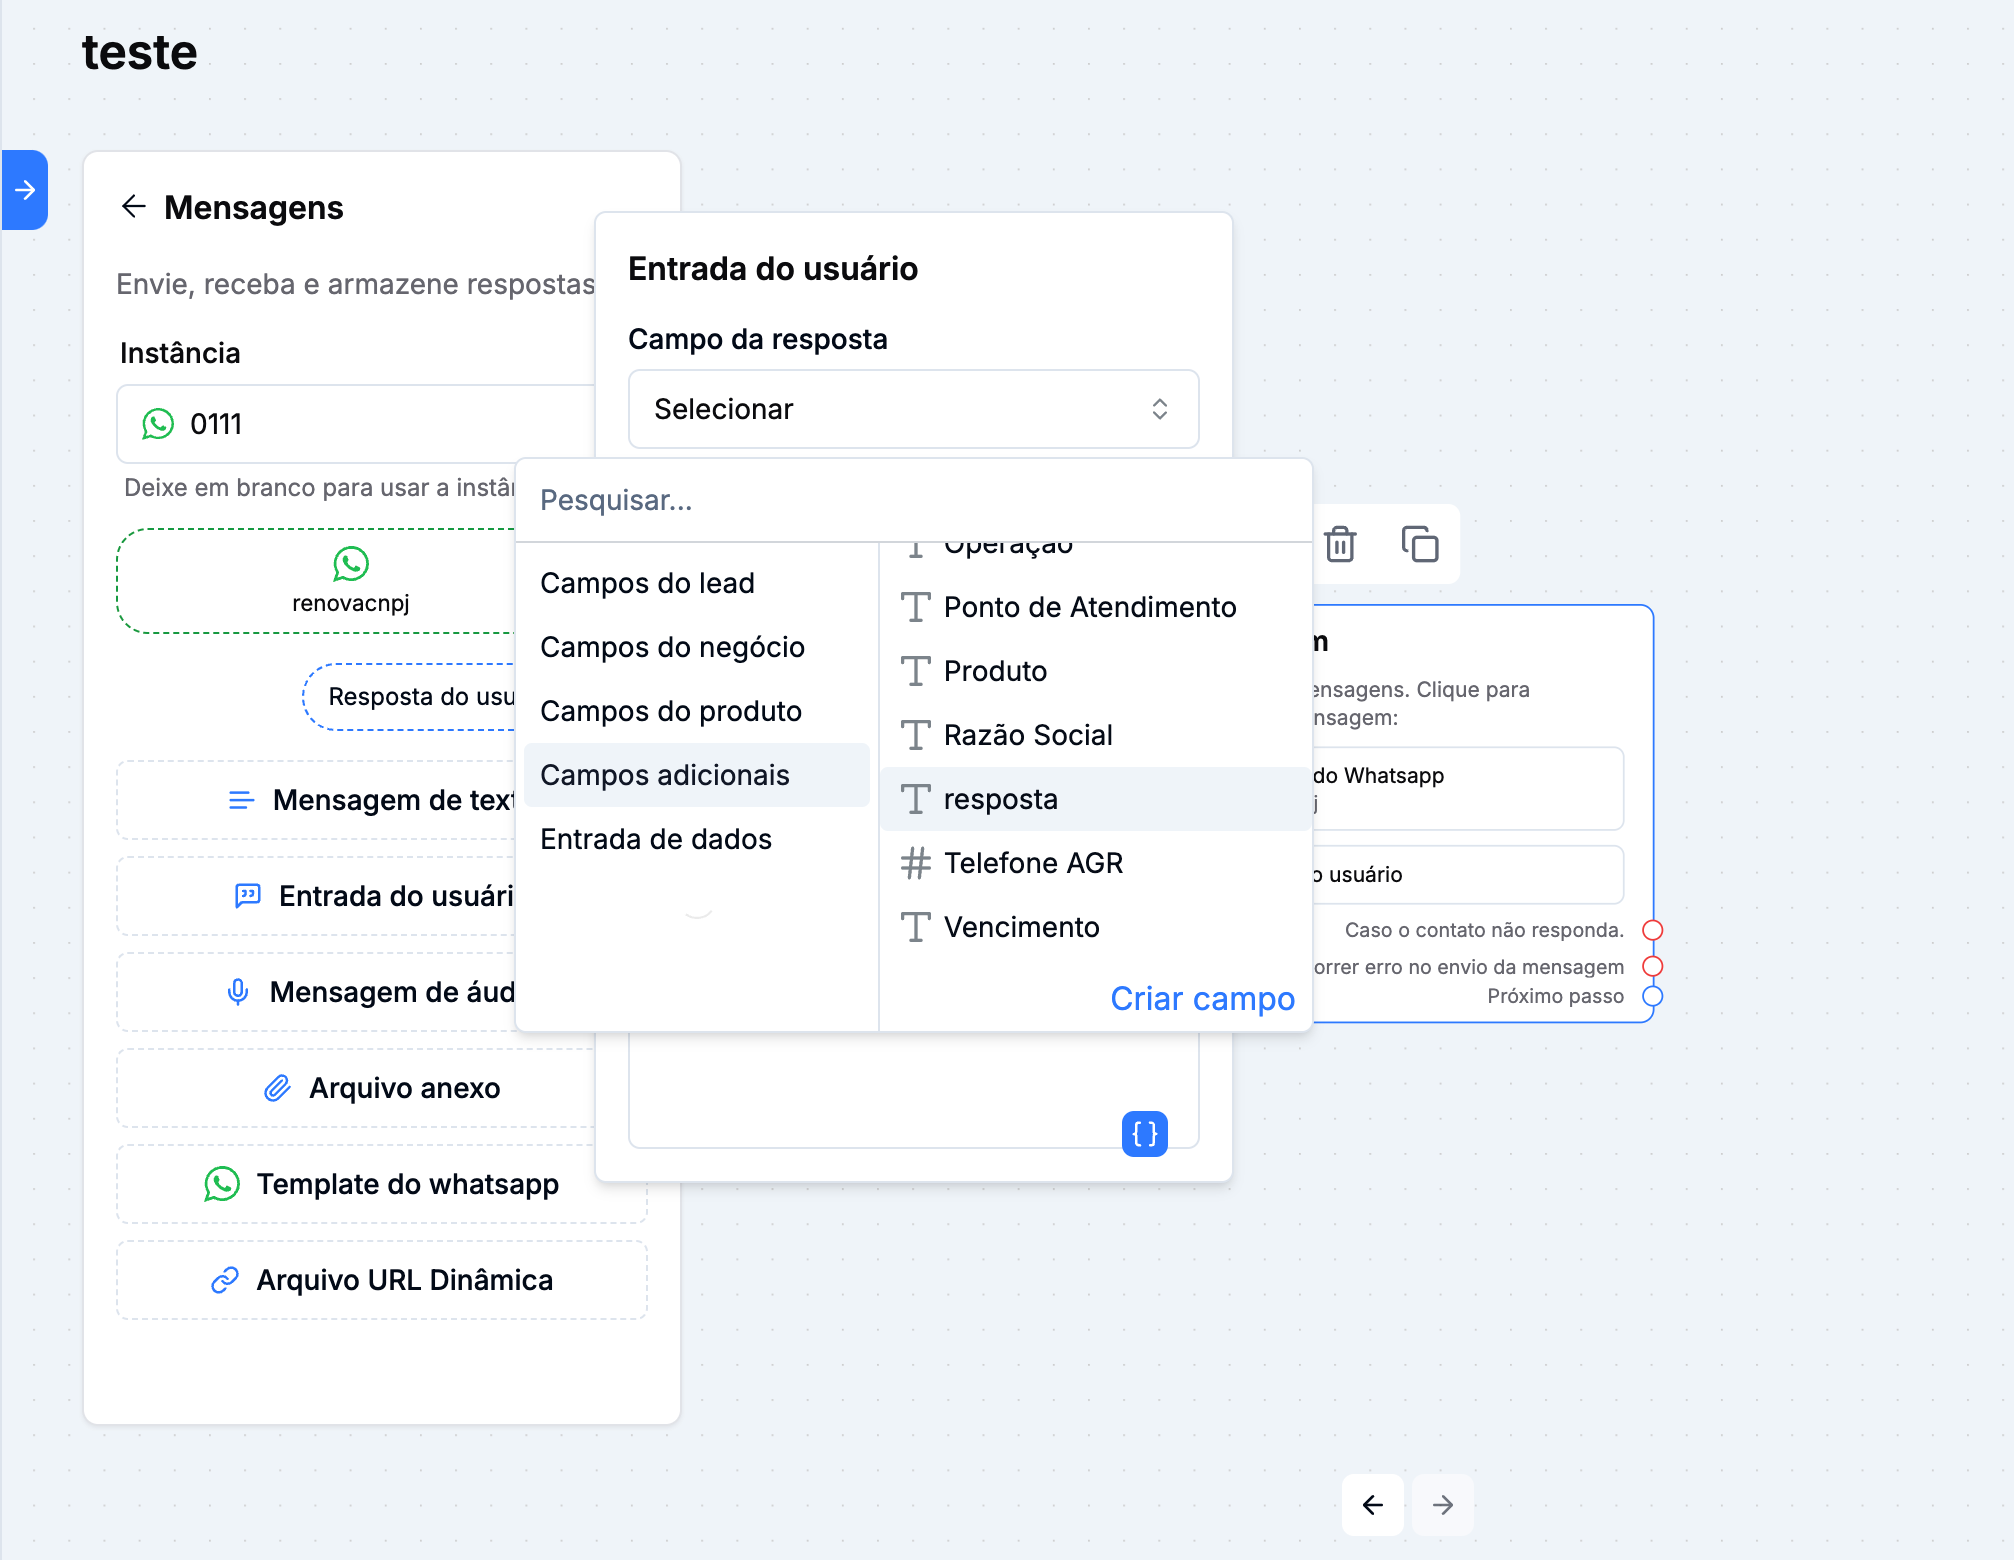
Under the "Response field" option, you need to pick an additional field. In this case, let's add the "response".
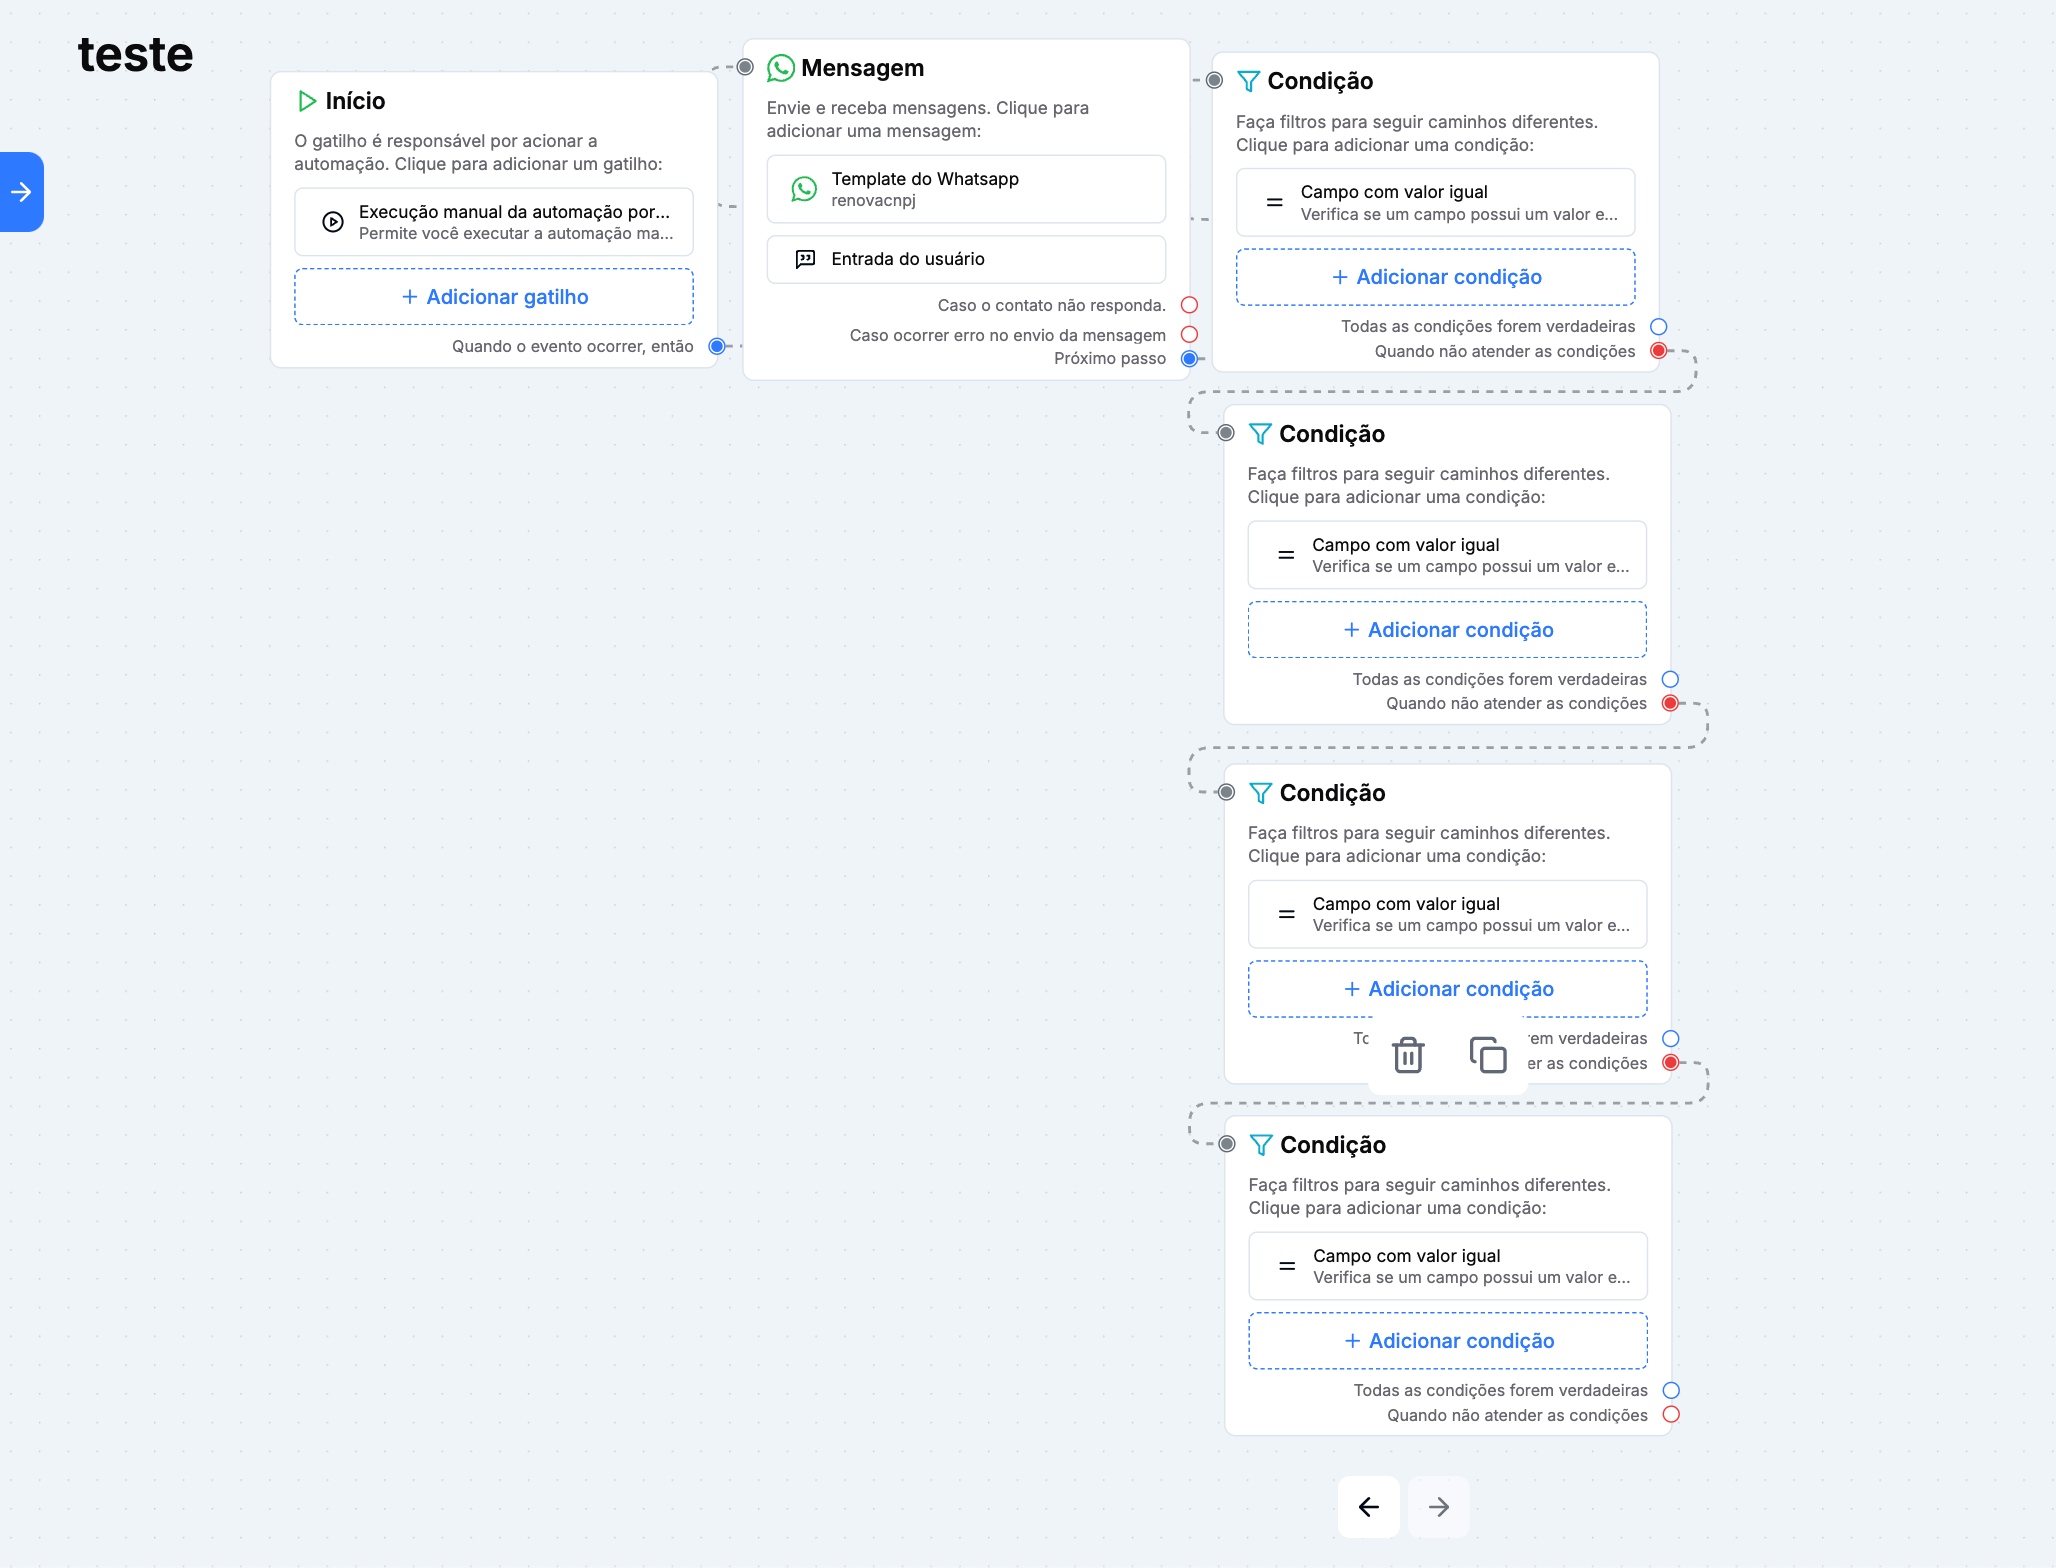
• Add the condition "Field equals value" for each button created.
• In the example, the first button "I want to renew" was added with the parameter "response", which matches the extra field set up in Step 2.
• Repeat this process for all buttons in the flow.

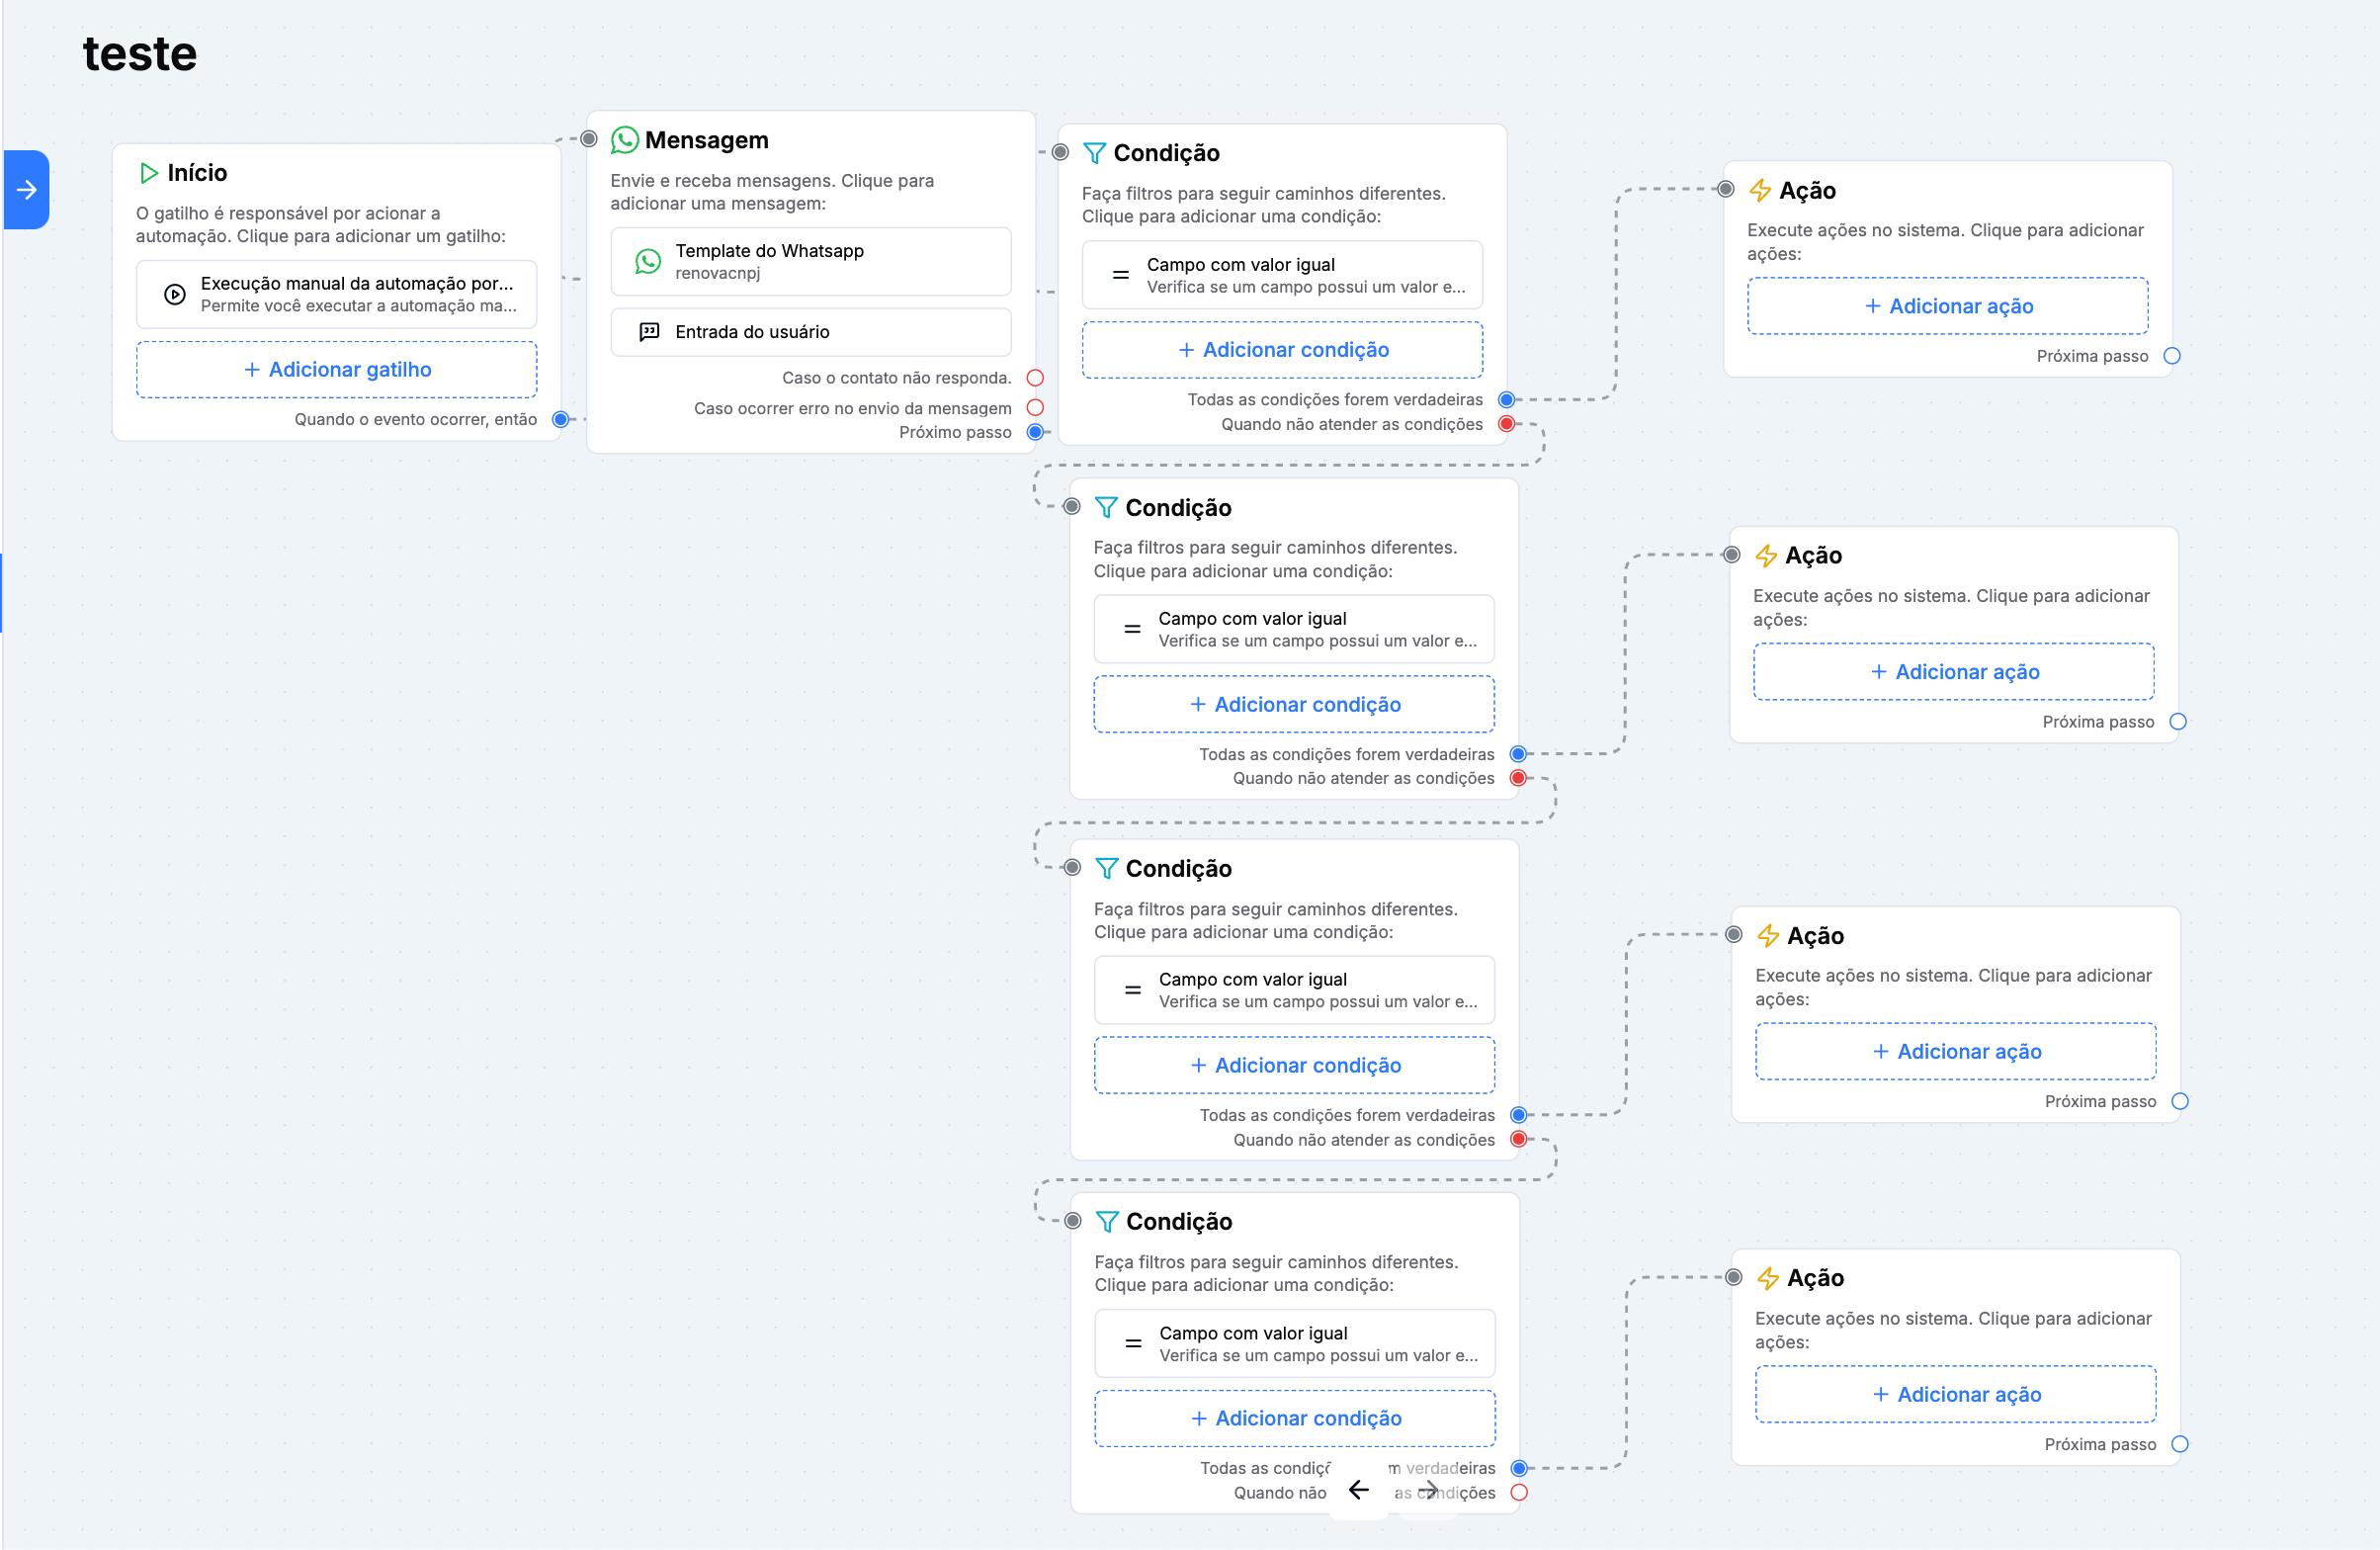
Your automation should look like this after mapping all the buttons
• After you've finished mapping all the buttons, set up the flow according to the action you want for each button selected.
• Each button can take the user to different steps or actions depending on your goal.