In this material, you will learn how to use the Leads tab in Datacrazy and understand how to query, create, edit, organize and manage your company's leads in a simple and efficient way.
The Leads tab is the central location where all contact information, history and interactions related to your customers and potential customers are stored.
When you access the Leads tab, you can see the complete list of leads registered in the system. From here you can:
Query existing leads;
Create new leads;
Edit information;
Delete leads, if necessary.
To create a lead manually, click the New Lead button.
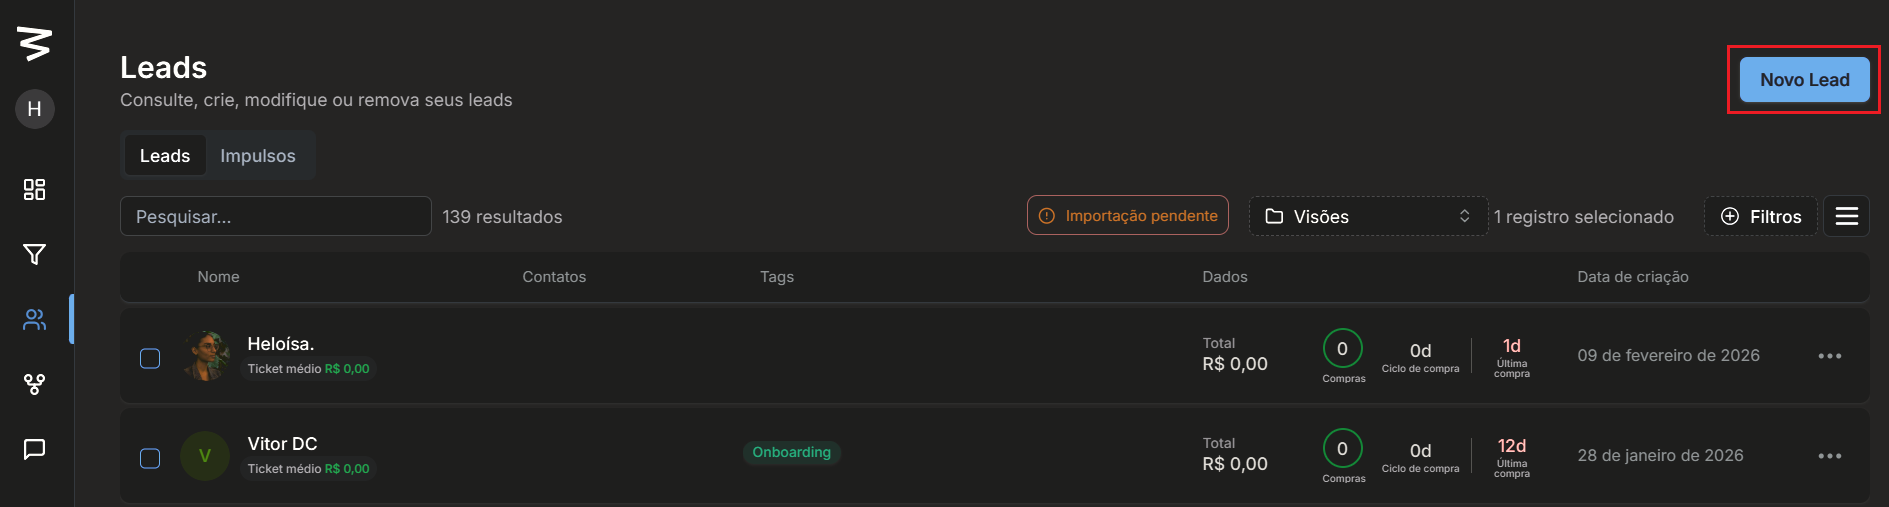
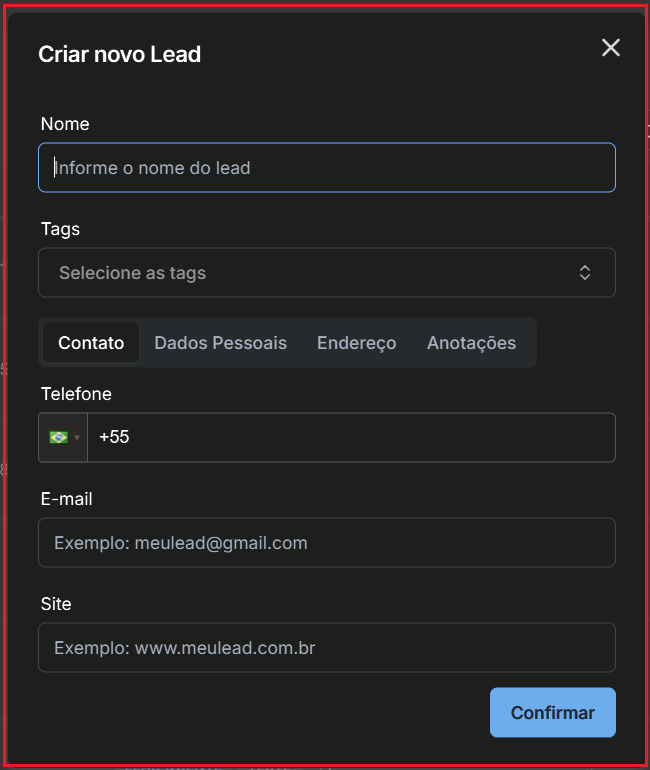
A form will be displayed for filling in the information.
It is important to note that the only mandatory information to create a lead in Datacrazy is the name.
However, it is highly recommended to add at least the phone number, as it is essential for contacting the lead, especially via WhatsApp.
When creating a lead, you can fill in:
Name;
Phone;
Email;
Website.
It is also possible to add tags at this moment.
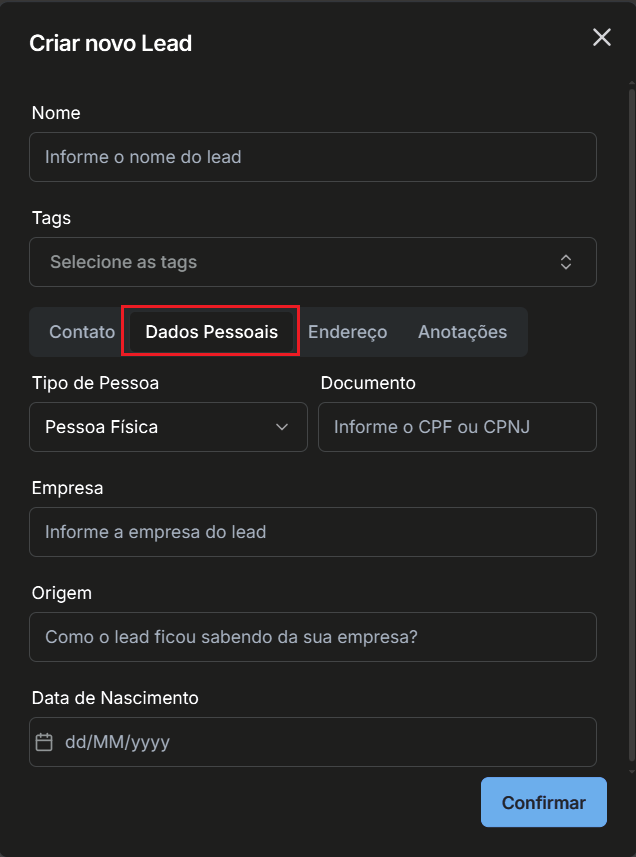
In the personal data section, it is possible to:
Enter the CNPJ or CPF;
Fill in the company name;
Define the lead source; that is, how they found out about your company.
If necessary, you can also:
Add the lead's address;
Insert internal notes; which are visible only to the team and help with relationship tracking.
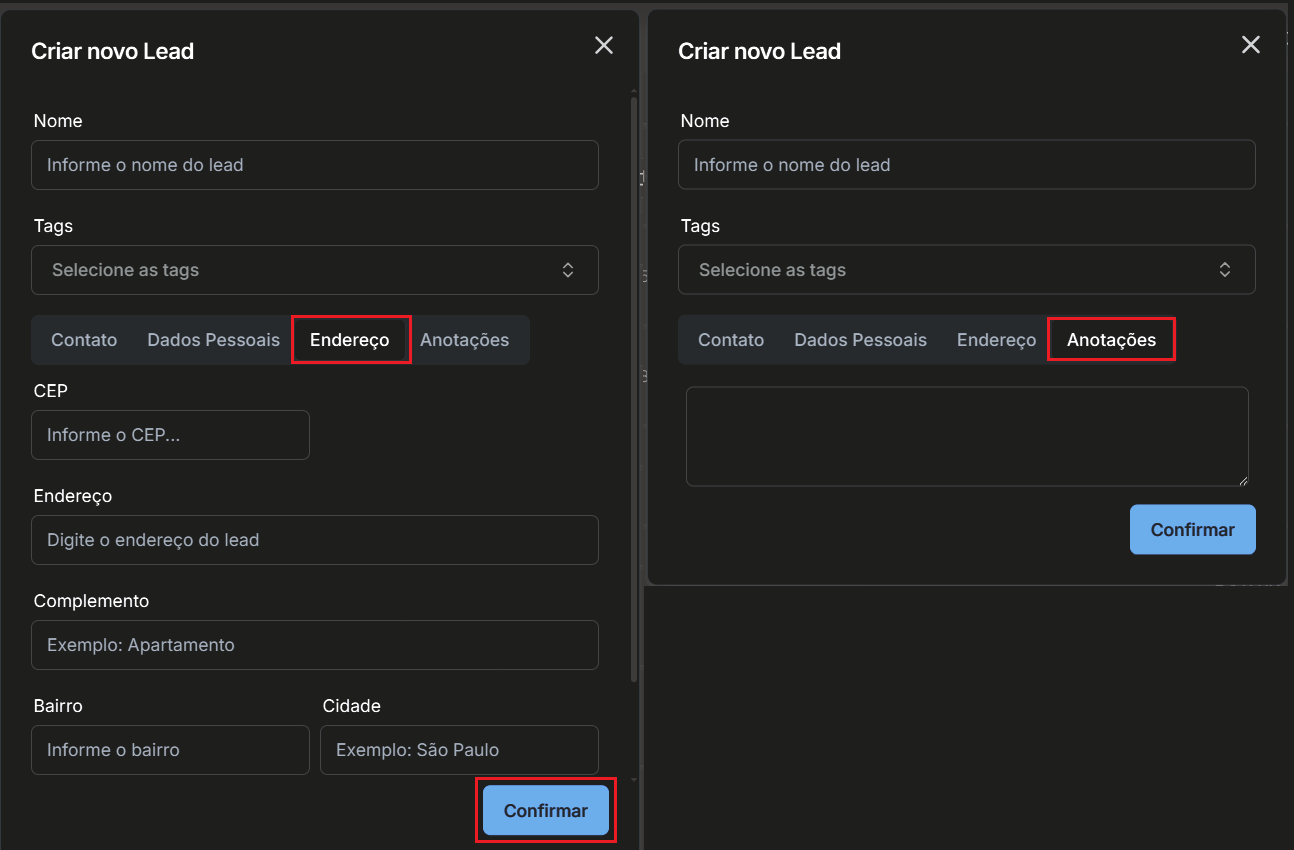
After filling in the information, click Confirm. The lead will be created and will automatically appear in the list.
When you click on a lead from the list, you access the complete lead profile within Datacrazy.
The first information displayed is the history of actions and movements performed with this lead in the system.
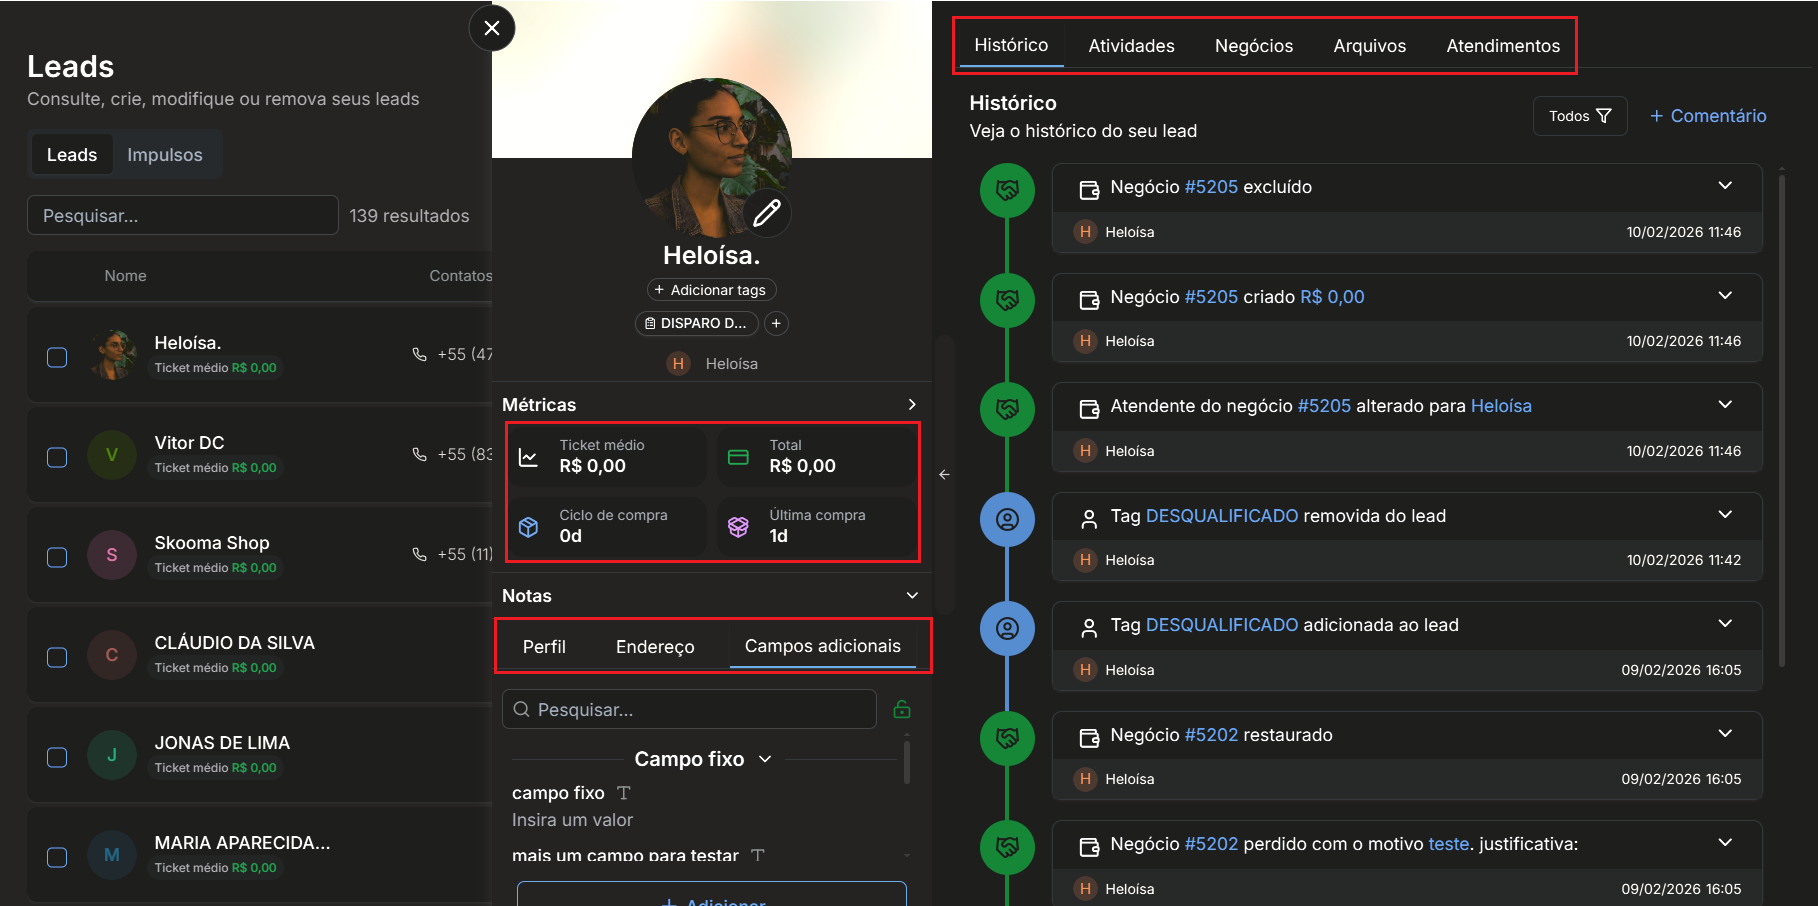
In the history, you find detailed records, such as:
Changes to name or phone number;
Creation of deals;
Internal movements;
Comments added by the team.
Everything that happens with the lead within Datacrazy is recorded in this history. It's also possible to add comments, which are available to the entire team.
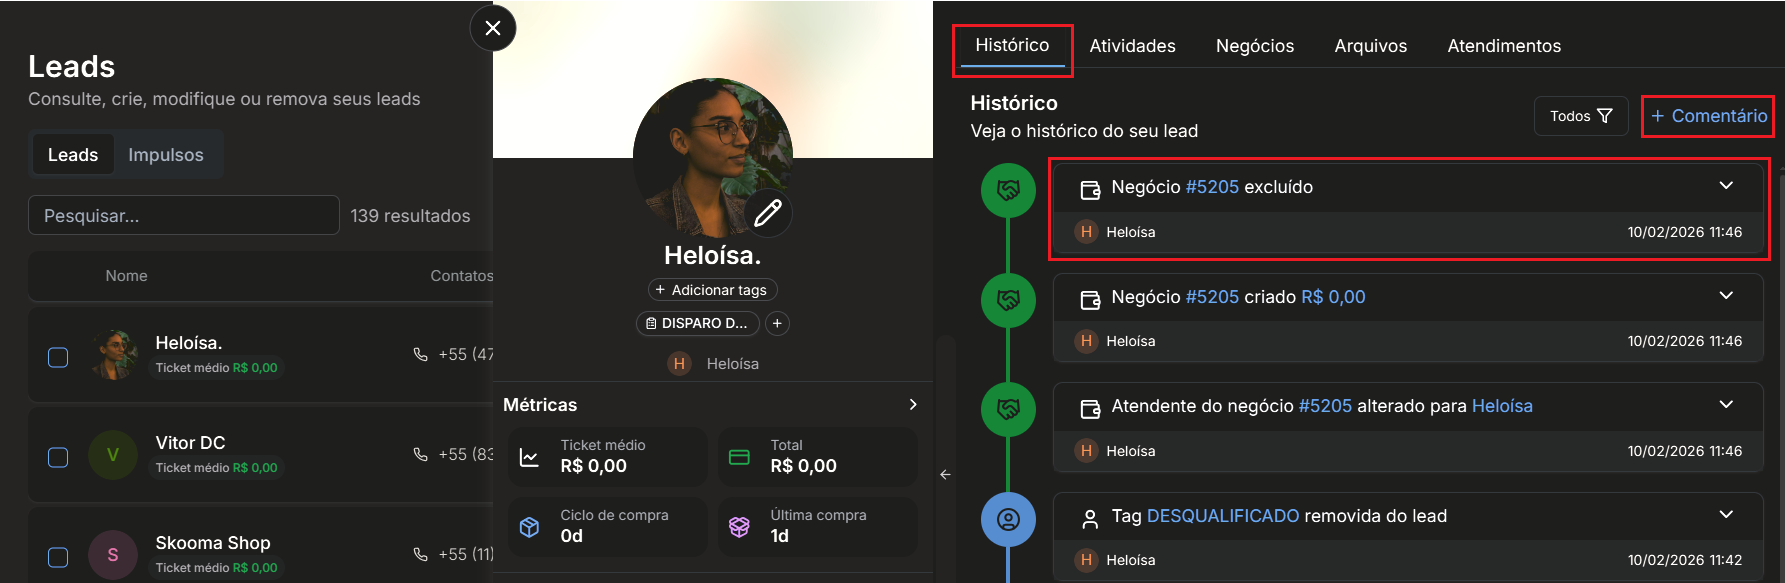
Next to the history, you'll find the activities menu.
From there, you can:
Create new activities;
View activities linked to the lead;
Track tasks related to the contact.
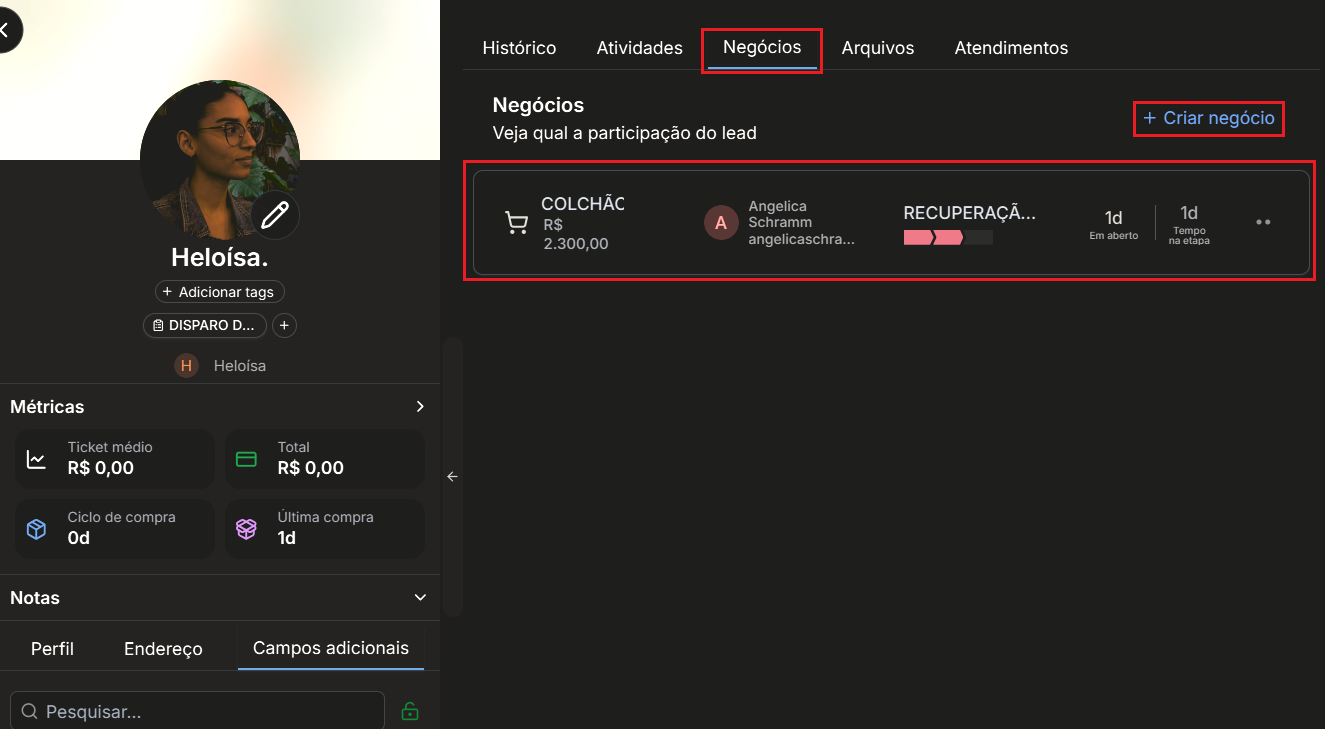
In the Deals tab, you have access to all deals associated with the lead, regardless of the pipeline.
You can:
Create new deals;
Have more than one deal for the same lead;
Work with deals in different pipelines.
Whenever a deal is created, this information also appears automatically in the lead's history.
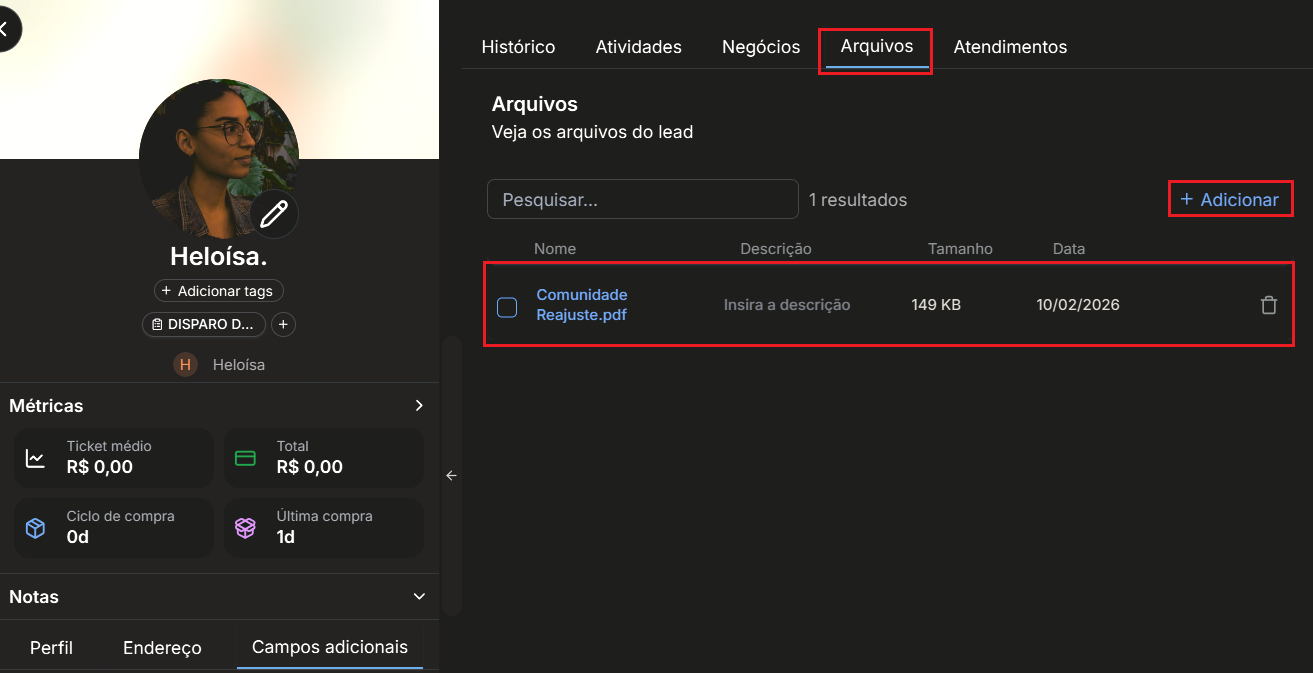
In the Files tab, you can store documents related to the lead.
To add a file:
Click Add;
Select the document from your computer;
The file will be attached to the lead's profile.
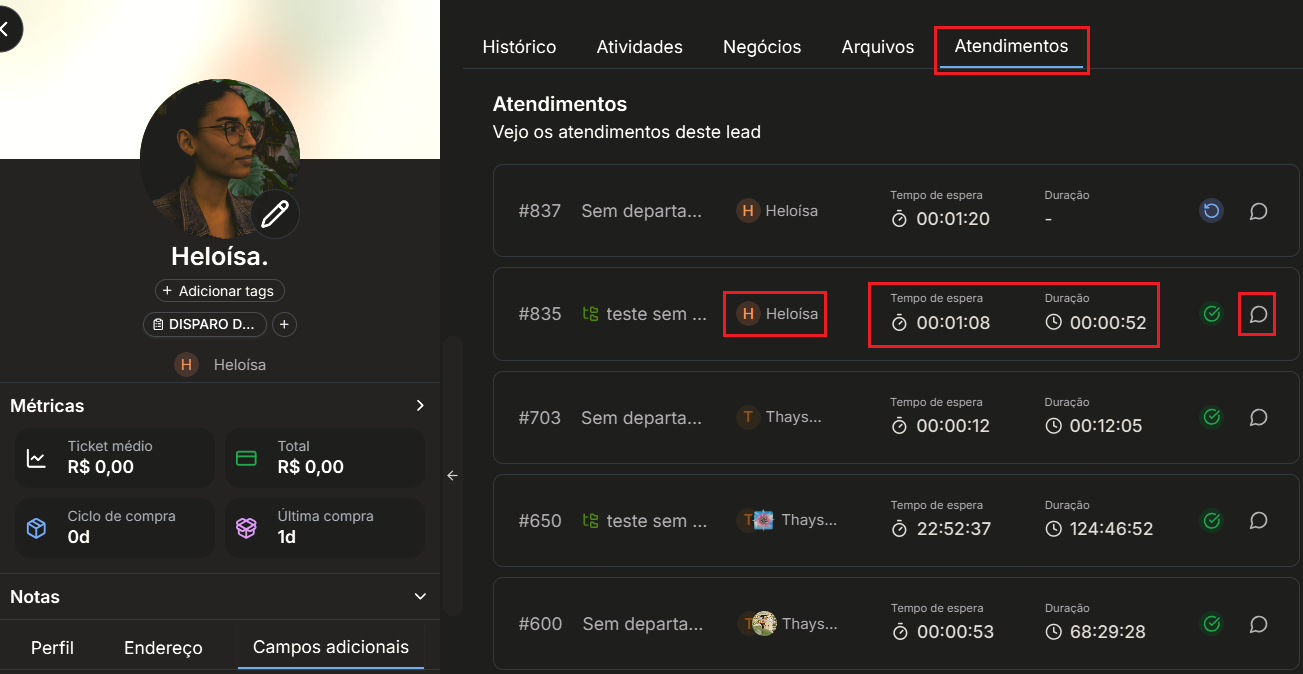
Another very relevant piece of information is interactions.
When the lead hasn't had any interaction yet, this area appears empty. As soon as there are interactions via live chat, all information related to the interaction becomes available in the profile, such as:
Department;
Responsible attendant;
Wait time;
Service duration;
Chat status (in progress, waiting, or completed).
You can also access the complete history of conversations held with the lead.
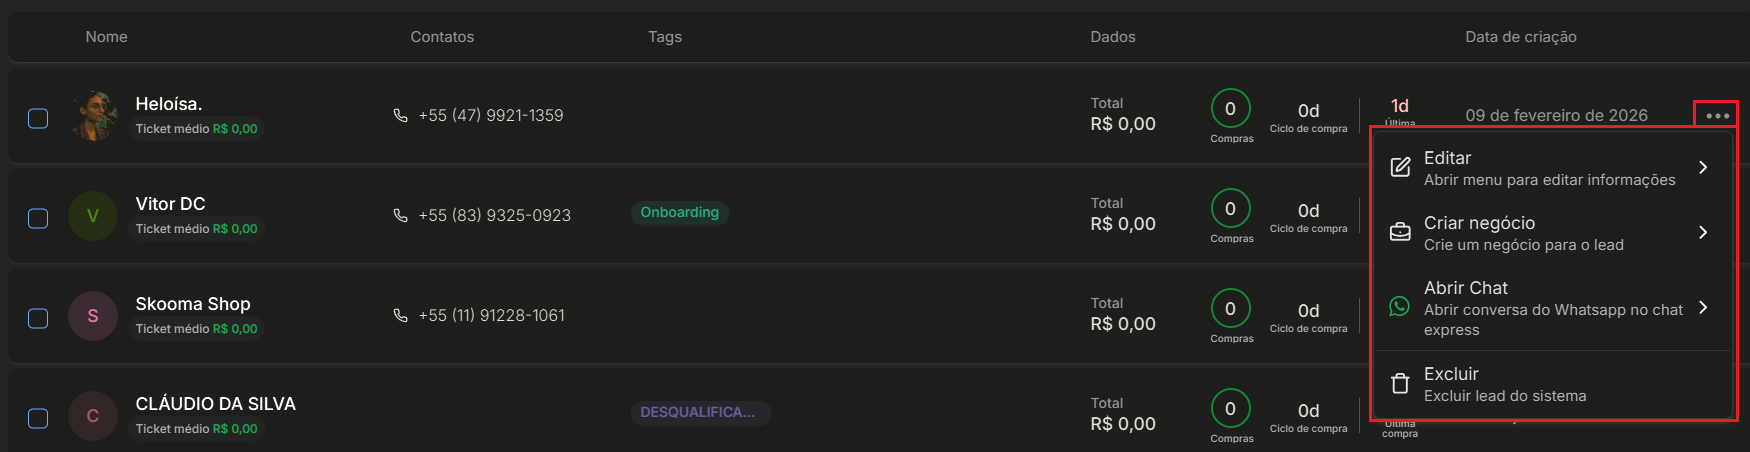
By clicking on the three dots, you access additional actions, such as:
Edit the lead's profile;
Create a new deal;
Open WhatsApp Express chat directly from Datacrazy.
In the options menu, next to the filters, you'll also find:
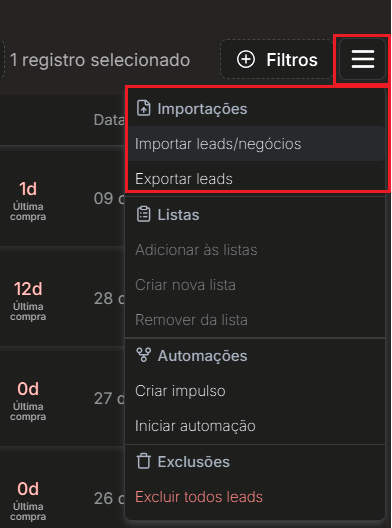
Lead import, to upload a spreadsheet to the system;
Lead export, to download the registered data.
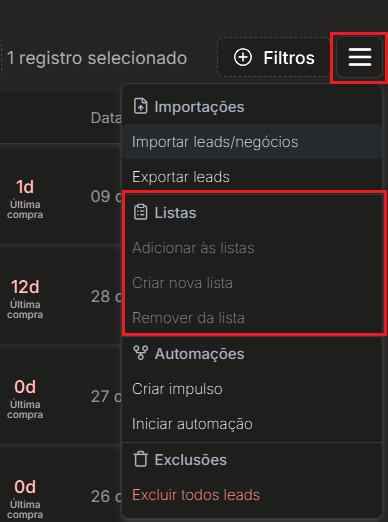
The lists are used for organization and also for bulk actions.
You can:
Create custom lists;
Use lists for specific sends or segmentations.
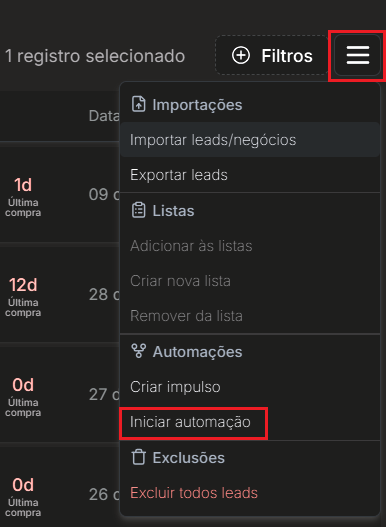
The Start automation button allows you to execute automations manually.
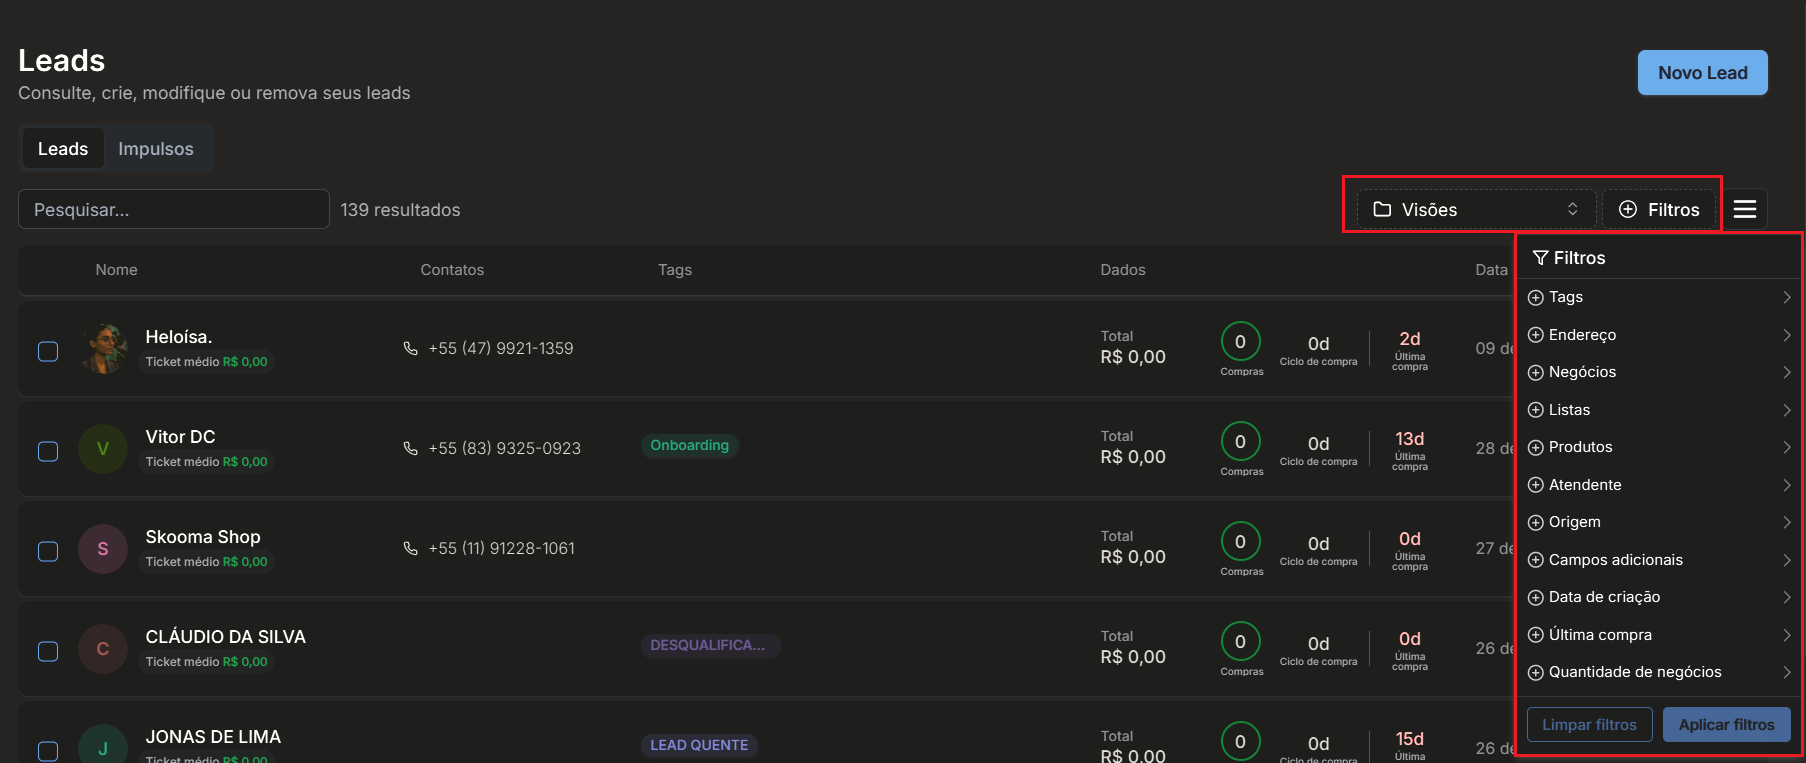
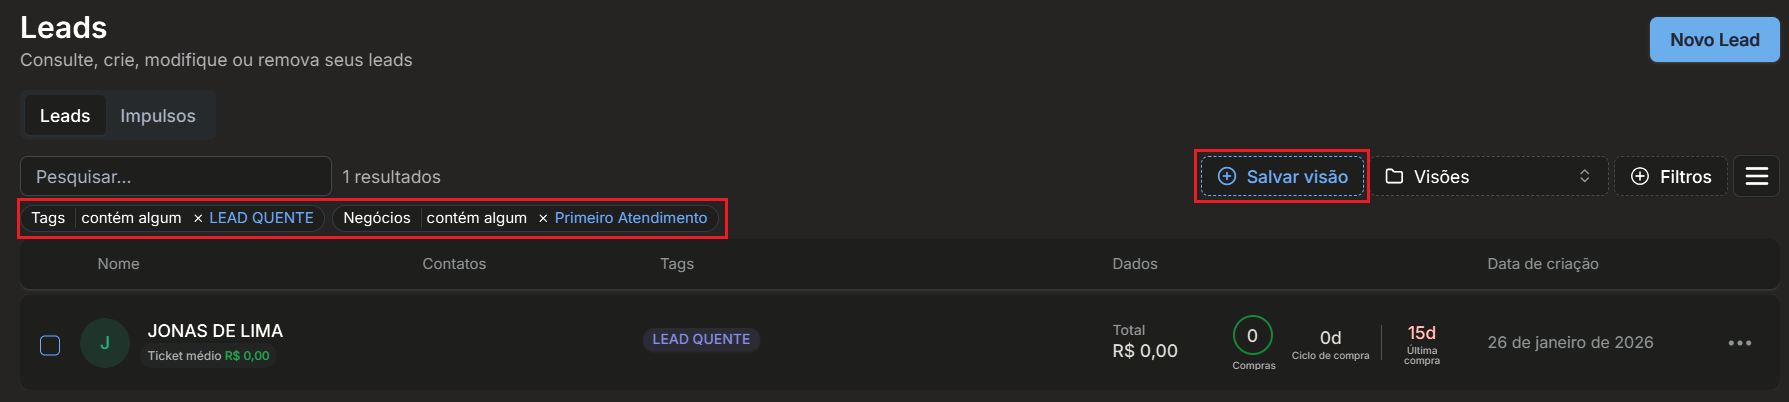
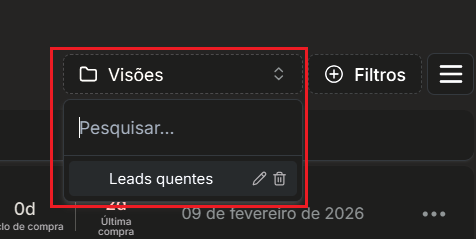
When you apply filters, you can save a custom view.
So, the next time you access the Leads tab:
Just select the saved view;
You don't need to redo all the filters manually.
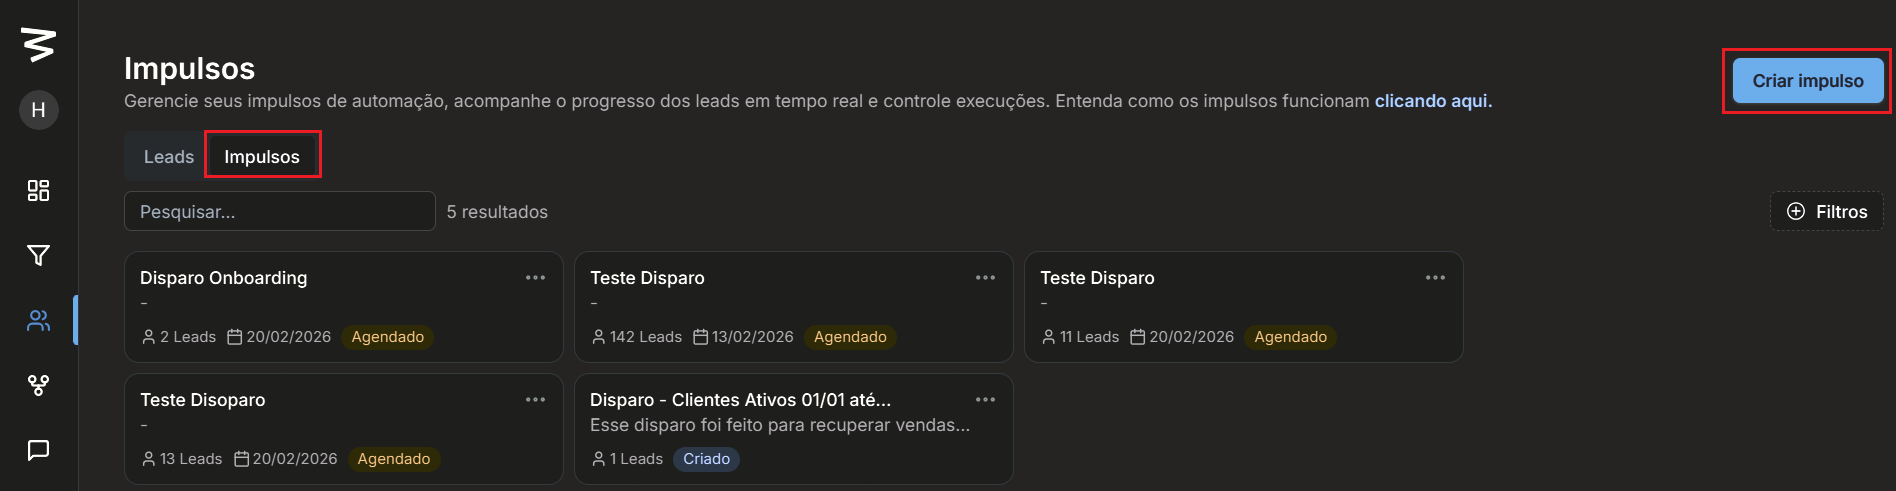
The Impulso is a Datacrazy feature designed for mass sending.
It significantly reduces message sending time, allowing large volumes to be sent in just a few minutes, especially when used with the official API.